I felt like I had to write this guide because currently, there are many players who don't understand how to play this magnificent game, and because the current guides are outdated. Let me teach you how to play!

- First of all, you have to join a game. You can do so by clicking the Tower Defence NPC and clicking the stone bricks.
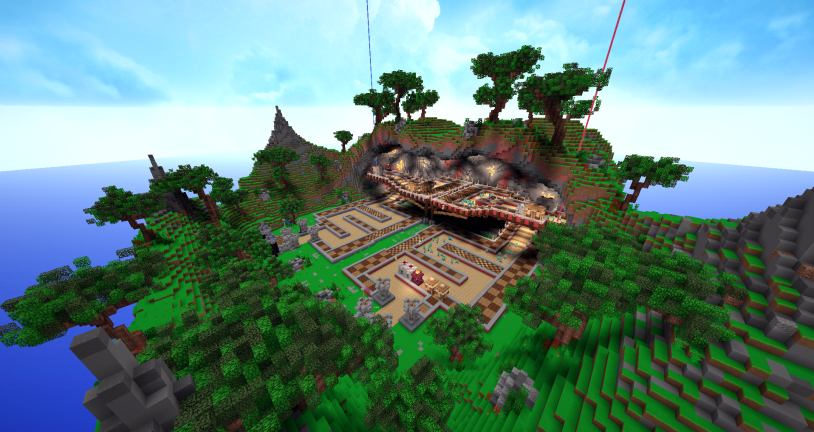
- After enough players have joined, you will join the game. You will be matched up against the other team. A team can have up to 6 members, and you together will have to prevent your castle from being destroyed!
- Each castle starts at 1000 health, and the health will decrease if mobs deal damage to the tower.
- There are 2, very powerful castle guards next to each castle. They will deal with enemy mobs. However, they won't be able to kill everything! Build towers to protect and defend your castle. Castle guards will be disabled if the Armageddon mode starts.
- You can send mobs which can deal damage to the enemy castle when they reach it. So, keep sending mobs. You can do so by clicking the chest in your hotbar. (You can send a maximum amount of 12 mobs by shift+clicking the mob you'd like to send to the enemy.) After that you have to click the monster spawner in the right corner.
- After a long time of playing, the Armageddon mode will start. The health of your castle will decrease to 25% of its health and more events will happen. Read more about the Armageddon mode below!
- You can earn experience (EXP) by sending waves of mobs. You can purchase several things with experience.
- In the castle bazaar (the stone bricks in your hotbar), you can upgrade your gold mine, sword, bow, and you can buy potions.
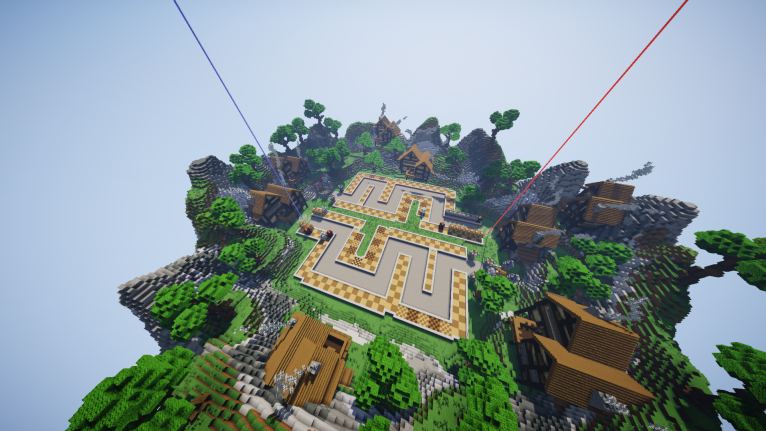
- You can place towers by right-clicking the chequered patterns. (Keep in mind that you should only place 3x3 towers in a 3x3 square, and 5x5 towers in a 5x5 square. Not doing so is considered team trolling and is a punishable offense. It could lead to a ban.)
- If your mobs have destroyed the enemy castle, you have won! Congratulations!

Mobs are creatures you can send to the enemy, to deal damage to their caste! But, how to send mobs? And which mobs are available? Don't worry, I will explain everything about every mob in this section of the guide, and give you some tips.
How to send mobs?
You can send mobs by clicking the chest in your inventory. This menu will show up:
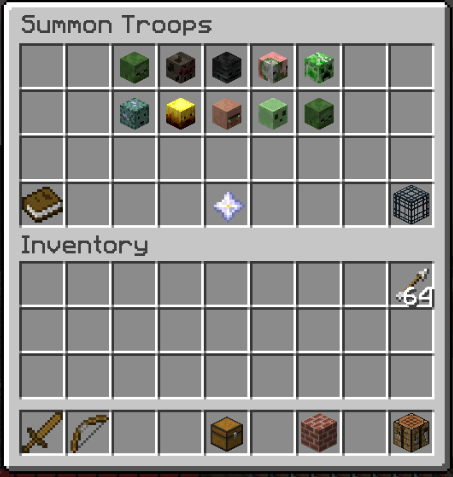
You can select several mobs. But which one is the strongest? I will tell you everything about mobs below.
This is the weakest mob. You'll unlock it when the game starts.
Wears no helmet.
Price: 15 coins
Damage: 1.0
HP: 40
Speed: 1.6 (Normal)
EXP Reward: 7
Price: 15 coins
Damage: 1.0
HP: 40
Speed: 1.6 (Normal)
EXP Reward: 7
Wears a leather helmet.
Price: 18 coins
Damage: 1.0
HP: 56
Speed: 1.6 (Normal)
EXP Reward: 9
Price: 18 coins
Damage: 1.0
HP: 56
Speed: 1.6 (Normal)
EXP Reward: 9
Wears a chain helmet.
Price: 22 coins
Damage: 1.0
HP: 78
Speed: 1.6 (Normal)
EXP Reward: 10
Price: 22 coins
Damage: 1.0
HP: 78
Speed: 1.6 (Normal)
EXP Reward: 10
Wears an iron helmet.
Price: 26 coins
Damage: 1.5
HP: 110
Speed: 1.6 (Normal)
EXP Reward: 13
Price: 26 coins
Damage: 1.5
HP: 110
Speed: 1.6 (Normal)
EXP Reward: 13
Wears a diamond helmet.
Price: 31 coins
Damage: 2.0
HP: 154
Speed: 1.6 (Normal)
EXP Reward: 30
Price: 31 coins
Damage: 2.0
HP: 154
Speed: 1.6 (Normal)
EXP Reward: 30
The low levels of the spider are pretty weak, but spiders can be very useful if the enemy has no mage or ice towers.
Looks like a normal spider.
Price: 25 coins
Damage: 1.0
HP: 80
Speed: 1.6 (Normal)
EXP Reward: 30
Price: 25 coins
Damage: 1.0
HP: 80
Speed: 1.6 (Normal)
EXP Reward: 30
Looks like a normal spider.
Price: 30 coins
Damage: 1.0
HP: 112
Speed: 2 (Fast)
EXP Reward: 32
Price: 30 coins
Damage: 1.0
HP: 112
Speed: 2 (Fast)
EXP Reward: 32
Looks like a cave spider.
Price: 36 coins
Damage: 1.5
HP: 157
Speed: 2.5 (Fast)
EXP Reward: 36
Price: 36 coins
Damage: 1.5
HP: 157
Speed: 2.5 (Fast)
EXP Reward: 36
Invisible.
Price: 43 coins
Damage: 1.0
HP: 222
Speed: 2.5 (Fast)
EXP Reward: 38
This spider is invisible to all towers except the ice and the mage tower.
Price: 43 coins
Damage: 1.0
HP: 222
Speed: 2.5 (Fast)
EXP Reward: 38
This spider is invisible to all towers except the ice and the mage tower.
Invisible.
Price: 52 coins
Damage: 1.5
HP: 307
Speed: 2.0 (Fast)
EXP Reward: 44
Price: 52 coins
Damage: 1.5
HP: 307
Speed: 2.0 (Fast)
EXP Reward: 44
The skeleton is a fantastic mob which can make you win games. Especially high-leveled skeletons are very strong! It's smart to send hordes of skeletons if your enemy is a little underpowered. The skeletons can deal a lot of damage at the beginning of the game, and can be used to farm experience at the end of the game.
Looks like a normal skeleton.
Price: 60 coins
Damage: 1.0
HP: 350
Speed: 1.6 (Normal)
EXP Reward: 60
Price: 60 coins
Damage: 1.0
HP: 350
Speed: 1.6 (Normal)
EXP Reward: 60
Rides zombie horse.
Price: 144 coins
Damage: 1.0
HP: 490
Speed: 1.6 (Normal)
EXP Reward: 66
Price: 144 coins
Damage: 1.0
HP: 490
Speed: 1.6 (Normal)
EXP Reward: 66
Rides skeleton horse.
Price: 173 coins
Damage: 1.0
HP: 686
Speed: 1.6 (Normal)
EXP Reward: 72
Price: 173 coins
Damage: 1.0
HP: 686
Speed: 1.6 (Normal)
EXP Reward: 72
Turns into wither skeleton, and rides zombie horse.
Price: 207 coins
Damage: 2.0
HP: 960
Speed: 1.6 (Normal)
EXP Reward: 80
This mob is invulnerable to the Mage and the Zeus Tower.
Price: 207 coins
Damage: 2.0
HP: 960
Speed: 1.6 (Normal)
EXP Reward: 80
This mob is invulnerable to the Mage and the Zeus Tower.
Rides skeleton horse.
Price: 249 coins
Damage: 2.5
HP: 1345
Speed: 1.6 (Normal)
EXP Reward: 43
EXP Reward: 80
This mob is invulnerable to the Mage and the Zeus Tower.
Price: 249 coins
Damage: 2.5
HP: 1345
Speed: 1.6 (Normal)
EXP Reward: 43
EXP Reward: 80
This mob is invulnerable to the Mage and the Zeus Tower.
A slow mob with a lot of HP. A good tank to place in front of weaker mobs. It's smart to send witches after you've sent creepers, so that the creepers will be healed.
Looks like a normal creeper.
Price: 300 coins
Damage: 1.0
HP: 450
Speed: 1.3 (Slow)
EXP Reward: 45
Price: 300 coins
Damage: 1.0
HP: 450
Speed: 1.3 (Slow)
EXP Reward: 45
Looks like a normal creeper.
Price: 360 coins
Damage: 1.0
HP: 630
Speed: 1.3 (Slow)
EXP Reward: 49
This mob can regenerate itself.
Price: 360 coins
Damage: 1.0
HP: 630
Speed: 1.3 (Slow)
EXP Reward: 49
This mob can regenerate itself.
Rides a pig.
Price: 432 coins
Damage: 1.0
HP: 882
Speed: 1.3 (Slow)
EXP Reward: 54
This mob can regenerate itself.
Price: 432 coins
Damage: 1.0
HP: 882
Speed: 1.3 (Slow)
EXP Reward: 54
This mob can regenerate itself.
Rides a cow.
Price: 518 coins
Damage: 1.8
HP: 1235
Speed: 1.3 (Slow)
EXP Reward: 60
This mob can regenerate itself.
Price: 518 coins
Damage: 1.8
HP: 1235
Speed: 1.3 (Slow)
EXP Reward: 60
This mob can regenerate itself.
Looks like a charged creeper.
Price: 622 coins
Damage: 2.5
HP: 1729
Speed: 1.3 (Slow)
EXP Reward: 66
This mob can regenerate itself, and it's charged.
Price: 622 coins
Damage: 2.5
HP: 1729
Speed: 1.3 (Slow)
EXP Reward: 66
This mob can regenerate itself, and it's charged.
The silferfish is a flying mob which is quite weak. Although it's weak, it can be useful if the enemy has few air defence.
This mob can fly, and is invulnerable to the Artillery, Poison, Sorcerer and Quake tower.
This mob can fly, and is invulnerable to the Artillery, Poison, Sorcerer and Quake tower.
Looks like a normal silverfish.
Price: 80 coins
Damage: 1.0
HP: 180
Speed: 1.6 (Normal)
EXP Reward: 18
Price: 80 coins
Damage: 1.0
HP: 180
Speed: 1.6 (Normal)
EXP Reward: 18
Looks like a normal silverfish.
Price: 96 coins
Damage: 1.0
HP: 252
Speed: 1.6 (Normal)
EXP Reward: 19
Price: 96 coins
Damage: 1.0
HP: 252
Speed: 1.6 (Normal)
EXP Reward: 19
Looks like a normal silverfish.
Price: 115 coins
Damage: 1.0
HP: 353
Speed: 1.6 (Normal)
EXP Reward: 19
Price: 115 coins
Damage: 1.0
HP: 353
Speed: 1.6 (Normal)
EXP Reward: 19
Turns into an endermite.
Price: 138 coins
Damage: 1.5
HP: 494
Speed: 1.6 (Normal)
EXP Reward: 21
Price: 138 coins
Damage: 1.5
HP: 494
Speed: 1.6 (Normal)
EXP Reward: 21
Looks like an endermite.
Price: 166 coins
Damage: 2.0
HP: 691
Speed: 1.6 (Normal)
EXP Reward: 22
Price: 166 coins
Damage: 2.0
HP: 691
Speed: 1.6 (Normal)
EXP Reward: 22
An expensive but strong mob. Can be very useful in the endgame. The mob flies.
This mob is invulnerable to Mage, Artillery, Poison, Sorcerer and Quake towers. The blaze does not transform into other creatures.
This mob is invulnerable to Mage, Artillery, Poison, Sorcerer and Quake towers. The blaze does not transform into other creatures.
Looks like a normal blaze.
Price: 500 coins
Damage: 1.0
HP: 410
Speed: 1.6 (Normal)
EXP Reward: 105
Price: 500 coins
Damage: 1.0
HP: 410
Speed: 1.6 (Normal)
EXP Reward: 105
Looks like a normal blaze.
Price: 600 coins
Damage: 1.0
HP: 574
Speed: 1.6 (Normal)
EXP Reward: 111
Price: 600 coins
Damage: 1.0
HP: 574
Speed: 1.6 (Normal)
EXP Reward: 111
Looks like a normal blaze.
Price: 720 coins
Damage: 1.0
HP: 804
Speed: 1.6 (Normal)
EXP Reward: 115
Price: 720 coins
Damage: 1.0
HP: 804
Speed: 1.6 (Normal)
EXP Reward: 115
Looks like a normal blaze.
Price: 864 coins
Damage: 1.5
HP: 1125
Speed: 1.6 (Normal)
EXP Reward: 121
Price: 864 coins
Damage: 1.5
HP: 1125
Speed: 1.6 (Normal)
EXP Reward: 121
Looks like a normal blaze.
Price: 1037 coins
Damage: 2.0
Speed: 1.6 (Normal)
EXP Reward: 127
Price: 1037 coins
Damage: 2.0
Speed: 1.6 (Normal)
EXP Reward: 127
A very fast mob, which can be useful in both the start and the middle of the game.
This mob is invulnerable to the Mage and the Zeus Tower.
This mob is invulnerable to the Mage and the Zeus Tower.
Looks like a normal zombie pigman
Price: 50 coins
Damage: 1.0
HP: 150
Speed: 2.0 (Fast)
EXP Reward: 44
Price: 50 coins
Damage: 1.0
HP: 150
Speed: 2.0 (Fast)
EXP Reward: 44
Holds golden sword.
Price: 120 coins
Damage: 1.0
HP: 210
Speed: 2.0 (Fast)
EXP Reward: 48
Price: 120 coins
Damage: 1.0
HP: 210
Speed: 2.0 (Fast)
EXP Reward: 48
Holds stone sword.
Price: 144 coins
Damage: 1.0
HP: 297
Speed: 2.0 (Fast)
EXP Reward: 50
Price: 144 coins
Damage: 1.0
HP: 297
Speed: 2.0 (Fast)
EXP Reward: 50
Holds iron sword.
Price: 173 coins
Damage: 1.0
HP: 412
Speed: 2.0 (Fast)
EXP Reward: 50
Price: 173 coins
Damage: 1.0
HP: 412
Speed: 2.0 (Fast)
EXP Reward: 50
Holds diamond sword.
Price: 207 coins
Damage: 1.5
HP: 576
Speed: 2.0 (Fast)
EXP Reward: 54
Price: 207 coins
Damage: 1.5
HP: 576
Speed: 2.0 (Fast)
EXP Reward: 54
The witch is a mob that can heal other mobs! They are very strong in mid- and endgame. Make sure to send some tanks in front of the witches you send, because they probably won't be able to get to other troops on their own. They can heal each other, too, which makes the witch a real threat.
Looks like a normal witch.
Price: 150 coins
Damage: 1.0
HP: 300
Speed: 1.6 (Normal)
EXP Reward: 37
Price: 150 coins
Damage: 1.0
HP: 300
Speed: 1.6 (Normal)
EXP Reward: 37
Looks like a normal witch.
Price: 165 coins
Damage: 1.0
HP: 420
Speed: 1.6 (Normal)
EXP Reward: 39
Price: 165 coins
Damage: 1.0
HP: 420
Speed: 1.6 (Normal)
EXP Reward: 39
Looks like a normal witch.
Price: 182 coins
Damage: 1.0
HP: 588
Speed: 1.6 (Normal)
EXP Reward: 42
Price: 182 coins
Damage: 1.0
HP: 588
Speed: 1.6 (Normal)
EXP Reward: 42
Looks like a normal witch.
Price: 200 coins
Damage: 1.5
HP: 823
Speed: 1.6 (Normal)
EXP Reward: 43
Price: 200 coins
Damage: 1.5
HP: 823
Speed: 1.6 (Normal)
EXP Reward: 43
Looks like a normal witch.
Price: 220 coins
Damage: 2.0
HP: 1152
Speed: 1.6 (Normal)
EXP Reward: 45
Price: 220 coins
Damage: 2.0
HP: 1152
Speed: 1.6 (Normal)
EXP Reward: 45
In my opinion, this is one of the best mobs. It has quite some HP and can deal a lot of damage when you upgrade it! However, it is expensive so make sure to upgrade your gold mine some times before you use this mob.
Looks like a normal slime. Splits once when it dies.
Price: 1500 coins
Damage: 1.0
HP: 800
Speed: 0.8 (Slow)
EXP Reward: 150
Price: 1500 coins
Damage: 1.0
HP: 800
Speed: 0.8 (Slow)
EXP Reward: 150
Looks like a normal slime. Splits twice when it dies.
Price: 1000 coins
Damage: 1.5
HP: 880
Speed: 0.8 (Slow)
EXP Reward: 157
Price: 1000 coins
Damage: 1.5
HP: 880
Speed: 0.8 (Slow)
EXP Reward: 157
Looks like a normal slime. Splits thrice when it dies.
Price: 2160 coins
Damage: 2.0
HP: 968
Speed: 0.8 (Slow)
EXP Reward: 165
Price: 2160 coins
Damage: 2.0
HP: 968
Speed: 0.8 (Slow)
EXP Reward: 165
Looks like a magma cube. Splits 4 times when it dies.
Price: 2592 coins
Damage: 2.5
HP: 1065
Speed: 0.8 (Slow)
EXP Reward: 174
This mob is invulnerable to the Mage Tower.[/SPOILER]
Price: 2592 coins
Damage: 2.5
HP: 1065
Speed: 0.8 (Slow)
EXP Reward: 174
This mob is invulnerable to the Mage Tower.[/SPOILER]
Looks like a magma cube. Splits 5 times when it dies.
Price: 3110 coins.
Damage: 3.0
HP: 1171
Speed: 0.8 (Slow)
EXP Reward: 183
This mob is invulnerable to the Mage Tower.
Price: 3110 coins.
Damage: 3.0
HP: 1171
Speed: 0.8 (Slow)
EXP Reward: 183
This mob is invulnerable to the Mage Tower.
The giant has a massive amont of HP and deals a lot of damage.
Despite of that, I don't think it's a very strong mob. The giant gets killed fast, which is due to its movement speed. However, make sure this huge zombies doesn't get close to your castle, because it will be destroyed in no time!
This mob is invulnerable to the Quake Tower, summons zombies and can regenerate itself.
Looks like a normal giant.
Price: 5000 coins
Damage: 10.0
HP: 3000
Speed: 0.8 (Slow)
EXP Reward: 300
Price: 5000 coins
Damage: 10.0
HP: 3000
Speed: 0.8 (Slow)
EXP Reward: 300
Wears a leather helmet.
Price: 5750 coins
Damage: 20.0
HP: 4200
Speed: 0.8 (Slow)
EXP Reward: 306
Price: 5750 coins
Damage: 20.0
HP: 4200
Speed: 0.8 (Slow)
EXP Reward: 306
Wears a chain helmet.
Price: 6613 coins
Damage: 30.0
HP: 5888
Speed: 0.8 (Slow)
EXP Reward: 312
Price: 6613 coins
Damage: 30.0
HP: 5888
Speed: 0.8 (Slow)
EXP Reward: 312
Wears an iron helmet.
Price: 7604 coins
Damage: 40.0
HP: 8232
Speed: 0.8 (Slow)
EXP Reward: 318
Price: 7604 coins
Damage: 40.0
HP: 8232
Speed: 0.8 (Slow)
EXP Reward: 318
Wears a diamond helmet.
Price: 8745 coins
Damage: 50.0
HP: 11525
Speed: 0.8 (Slow)
EXP Reward: 324
Price: 8745 coins
Damage: 50.0
HP: 11525
Speed: 0.8 (Slow)
EXP Reward: 324

The mobs, that can damage the castle, should be defeated in some way. There should be a way to defend the castle! Well, there already are some ways, and one of them is by placing towers to defend your castle! Here, you will tell you everything about the towers of the game.
The Archer Tower can shoot arrows to both troops in the ground and in the air. Its level 1 version is not that strong, but if you upgrade the tower for multiple times, it can turn into a real mob slayer!
Price: 160 coins
Rate: 2 seconds
Range: 10 blocks
Type of damage: Arrows
Rate: 2 seconds
Range: 10 blocks
Type of damage: Arrows
Shoots 2 arrows at once.
Price: 260 coins
Rate: 1.5 seconds
Range: 12 blocks
Type of damage: Arrows
Price: 260 coins
Rate: 1.5 seconds
Range: 12 blocks
Type of damage: Arrows
Shoots 3 arrows at once.
Price: 450 coins
Rate: 1.5 seconds
Range: 13 blocks
Type of damage: Arrows
Price: 450 coins
Rate: 1.5 seconds
Range: 13 blocks
Type of damage: Arrows
Shoots 4 arrows at once.
Price: 920 coins
Rate: 1.2 seconds
Range: 15 blocks
Type of damage: Arrows
Price: 920 coins
Rate: 1.2 seconds
Range: 15 blocks
Type of damage: Arrows
Shoots fire arrows.
Price: 220 coins
Rate: 2 seconds
Range: 12 blocks
Type of damage: Arrows
Price: 220 coins
Rate: 2 seconds
Range: 12 blocks
Type of damage: Arrows
Shoots 2 fire arrows at once.
Price: 660 coins
Rate: 2 seconds
Range: 13 blocks
Type of damage: Arrows
Price: 660 coins
Rate: 2 seconds
Range: 13 blocks
Type of damage: Arrows
Shoots 2 fire arrows and 1 explosive arrow at once.
Price: 1690 coins
Rate: 2 seconds
Range: 15 blocks
Type of damage: Arrows
Price: 1690 coins
Rate: 2 seconds
Range: 15 blocks
Type of damage: Arrows
The Ice tower deals no to a little damage, but in spite of this, it is pretty strong, because it slows down enemy troops, and it has a long range. It's handy to place an ice tower here and there.
Price: 280 coins
Rate: 1 second
Range: 10 blocks
Type of damage: Ice
Rate: 1 second
Range: 10 blocks
Type of damage: Ice
Price: 60 coins
Rate: 1 second
Range: 12 blocks
Type of damage: Ice
Rate: 1 second
Range: 12 blocks
Type of damage: Ice
Price: 80 coins
Rate: 1 second
Range: 13 blocks
Type of damage: Ice
Rate: 1 second
Range: 13 blocks
Type of damage: Ice
Now the ice damages the mob.
Price: 210 coins
Rate: 1 second
Range: 15 blocks
Type of damage: Ice
Price: 210 coins
Rate: 1 second
Range: 15 blocks
Type of damage: Ice
The Sorcerer Tower is a must-have if the enemy has sent giants. The mobs it spawns are able to take down tanks (mobs with a lot of HP) fast. Keep in mind that the mobs this tower summons cannot kill flying mobs.
Summons a friendly troop.
Price: 800 coins
Rate: 5 seconds
Range: 10 blocks
Type of damage: Mob damage
Price: 800 coins
Rate: 5 seconds
Range: 10 blocks
Type of damage: Mob damage
Price: 200 coins
Rate: 4 seconds
Range: 12 blocks
Type of damage: Mob damage
Rate: 4 seconds
Range: 12 blocks
Type of damage: Mob damage
Summons a kamikaze.
Price: 130 coins
Rate: 4 seconds
Range: 14 blocks
Type of damage: Mob damage
Price: 130 coins
Rate: 4 seconds
Range: 14 blocks
Type of damage: Mob damage
Summons 2 kamikazes.
Price: 460 coins
Rate: 4 seconds
Range: 15 blocks
Type of damage: Mob damage
Price: 460 coins
Rate: 4 seconds
Range: 15 blocks
Type of damage: Mob damage
Summons 3 friendly troops.
Price: 300 coins
Rate: 4 seconds
Range: 14 blocks
Type of damage: Mob damage
Price: 300 coins
Rate: 4 seconds
Range: 14 blocks
Type of damage: Mob damage
Summons 4 friendly troops.
Price: 530 coins
Rate: 4 seconds
Range: 15 blocks
Type of damage: Mob damage
Price: 530 coins
Rate: 4 seconds
Range: 15 blocks
Type of damage: Mob damage
Price: 1020 coins
Rate: 5 seconds
Range: 10 blocks
Type of damage: Lightning bolts
Rate: 5 seconds
Range: 10 blocks
Type of damage: Lightning bolts
Price: 260 coins
Rate: 4 seconds
Range: 12 blocks
Type of damage: Lightning bolts
Rate: 4 seconds
Range: 12 blocks
Type of damage: Lightning bolts
Lightning bolts bounce 3 times.
Price: 460 coins
Rate: 4 seconds
Range: 14 blocks
Type of damage: Lightning bolts
Price: 460 coins
Rate: 4 seconds
Range: 14 blocks
Type of damage: Lightning bolts
Lightning bolts bounce 5 times.
Price: 620 coins
Rate: 4 seconds
Range: 15 blocks
Type of damage: Lightning bolts
Price: 620 coins
Rate: 4 seconds
Range: 15 blocks
Type of damage: Lightning bolts
Summons a baby zeus.
Price: 520 coins
Rate: 2 seconds
Range: 14 blocks
Type of damage: Mob damage
Price: 520 coins
Rate: 2 seconds
Range: 14 blocks
Type of damage: Mob damage
Price: 620 coins
Rate: 1 second
Range: 15 blocks
Ty[e of damage: Mob damage
Rate: 1 second
Range: 15 blocks
Ty[e of damage: Mob damage
The Turret Tower is a real killer. It can both kill mobs on the ground and in the air. Make sure to place some of this tower to take down troops fast.
Price: 1000 coins
Rate: 0.5 seconds
Range: 12 blocks
Type of damage: Arrows
Rate: 0.5 seconds
Range: 12 blocks
Type of damage: Arrows
Price: 1200 coins
Rate: 0.4 seconds
Range: 15 blocks
Type of damage: Arrows
Rate: 0.4 seconds
Range: 15 blocks
Type of damage: Arrows
Shoots 2 arrows at a time.
Price: 2800 coins
Rate: 0.2 seconds
Range: 20 blocks
Type of damage: Arrows
Price: 2800 coins
Rate: 0.2 seconds
Range: 20 blocks
Type of damage: Arrows
Arrows bounce twice.
Price: 1100 coins
Rate: 0.5 seconds
Range: 12 blocks
Type of damage: Arrows
Price: 1100 coins
Rate: 0.5 seconds
Range: 12 blocks
Type of damage: Arrows
Arrows bounce 5 times.
Price: 1500 coins
Rate: 0.5 seconds
Range: 14 blocks
Type of damage: Arrows
Price: 1500 coins
Rate: 0.5 seconds
Range: 14 blocks
Type of damage: Arrows
A must-have in every game. This tower charges beams and deals damage by releasing a death ray. It even deals damage while charging!
Charges up from enemies, and releases a death ray when fully charged.
Price: 3000 coins
Rate: 1 second
Range: 12 blocks
Type of damage: Death ray
Price: 3000 coins
Rate: 1 second
Range: 12 blocks
Type of damage: Death ray
Charges 2 beams at the same time, and constantly deals a small amount of damage whilst charging.
Price: 2100 coins
Rate: 1 second
Range: 14 blocks
Type of damage: Death ray
Price: 2100 coins
Rate: 1 second
Range: 14 blocks
Type of damage: Death ray
It's smart to place mage towers near your castle and near the spawnpoint of the enemy mobs. Also place some in the middle of the map. The mage tower is very effective against spiders.
Price: 350 coins
Rate: 5 seconds
Range: 10 blocks
Type of damage: Fire
Rate: 5 seconds
Range: 10 blocks
Type of damage: Fire
Price: 70 coins
Rate: 4 seconds
Range: 12 blocks
Type of damage: Fire
Rate: 4 seconds
Range: 12 blocks
Type of damage: Fire
Price: 90 coins
Rate: 3 seconds
Range: 13 blocks
Type of damage: Fire
Rate: 3 seconds
Range: 13 blocks
Type of damage: Fire
Shoots fireballs.
Price: 580 coins
Rate: 1 second
Range: 15 blocks
Type of damage: Fire and fireballs
Price: 580 coins
Rate: 1 second
Range: 15 blocks
Type of damage: Fire and fireballs
The Artillery Tower is a strong tower if placed in groups. On its own, the tower isn't that strong, but imagine the things that can happen if the towers are placed in groups, and can plant landmines!
Blows up enemies.
Price:
Rate: 7 seconds
Range: 10 blocks
Type of damage: Explosion damage
Price:
Rate: 7 seconds
Range: 10 blocks
Type of damage: Explosion damage
Uses frag bombs to deal damage.
Price: 110 coins
Rate: 7 seconds
Range: 12 blocks
Type of damage: Explosion damage
Price: 110 coins
Rate: 7 seconds
Range: 12 blocks
Type of damage: Explosion damage
Price: 270 coins
Rate: 7 seconds
Range: 13 blocks
Type of damage: Explosion damage
Rate: 7 seconds
Range: 13 blocks
Type of damage: Explosion damage
Longer stun.
Price: 300 coins
Rate: 7 seconds
Range: 15 blocks
Type of damage: Explosion damage
Price: 300 coins
Rate: 7 seconds
Range: 15 blocks
Type of damage: Explosion damage
Plants landmines.
Price: 390 coins
Rate: 5 seconds
Range: 13 blocks
Type of damage: Explosion damage
Price: 390 coins
Rate: 5 seconds
Range: 13 blocks
Type of damage: Explosion damage
Plants more landmines.
Price: 460 coins
Rate: 4 seconds
Range: 15 blocks
Type of damage: Explosion damage
Price: 460 coins
Rate: 4 seconds
Range: 15 blocks
Type of damage: Explosion damage
You need to place some Quake Towers because they can help you kill strong mobs. The Quake Tower can stun mobs, deal damage to them and it can even throw blocks in the air! What else would you want?
Stuns enemies for 3 seconds.
Price: 200 coins
Rate: 5 seconds
Range: 10 blocks
Type of damage: Damage caused by small 'earthquakes'.
Price: 200 coins
Rate: 5 seconds
Range: 10 blocks
Type of damage: Damage caused by small 'earthquakes'.
Stuns enemies for 4 seconds.
Price: 320 coins
Rate: 4 seconds
Range: 12 blocks
Type of damage: Damage caused by a small 'earthquakes'
Price: 320 coins
Rate: 4 seconds
Range: 12 blocks
Type of damage: Damage caused by a small 'earthquakes'
Stuns enemies for 5 seconds.
Price: 560 coins
Rate: 3 seconds
Range: 13 blocks
Type of damage: Damage caused by earthquakes
Price: 560 coins
Rate: 3 seconds
Range: 13 blocks
Type of damage: Damage caused by earthquakes
Stuns enemies for 6 seconds, and throws blocks in the air.
Price: 1450 coins
Rate: 2 seconds
Range: 15 blocks
Type of damage: Damage caused by earthquakes
Price: 1450 coins
Rate: 2 seconds
Range: 15 blocks
Type of damage: Damage caused by earthquakes
The Poison Tower is incredibly strong and helps you defend your castle. This tower is silent but deadly. It's clever to build a Poison Tower with path 1 near the spawnpoint of the mobs, so that the effect will last 30 seconds or forever. After that, you could build some Poison Towers with path 2 in other places of the map, to deal more damage to the enemy troops.
Effect lasts 5 seconds.
Price: 380 coins
Rate: 5 seconds
Range: 10 blocks
Type of damage: Poison
Price: 380 coins
Rate: 5 seconds
Range: 10 blocks
Type of damage: Poison
Effect lasts 10 seconds
Price: 320 coins
Rate: 5 seconds
Range: 12 blocks
Type of damage: Poison
Price: 320 coins
Rate: 5 seconds
Range: 12 blocks
Type of damage: Poison
Effect lasts 30 seconds
Price: 450 coins
Rate: 5 seconds
Range: 13 blocks
Type of damage: Poison
Price: 450 coins
Rate: 5 seconds
Range: 13 blocks
Type of damage: Poison
Effect lasts forever.
Price: 720 coins
Rate: 5 seconds
Range: 15 blocks
Type of damage: Poison
Price: 720 coins
Rate: 5 seconds
Range: 15 blocks
Type of damage: Poison
Harms enemies near the poison tower.
Price: 520 coins
Rate: 10 seconds
Range: 13 blocks
Type of damage: Poison
Price: 520 coins
Rate: 10 seconds
Range: 13 blocks
Type of damage: Poison
Poison strength doubles.
Price: 270 coins
Rate: 10 seconds
Range: 15 blocks
Type of damage: Poison
Price: 270 coins
Rate: 10 seconds
Range: 15 blocks
Type of damage: Poison
You must have some Necromancer Towers in your defence. In my opinion the shulkers are stronger than the snowmen, but you could try placing some Necromancers with path 2, too! It's (almost) always advantageous to try things out and create new tactics.
Summons an iron golem.
Price: 790 coins
Rate: 2 seconds
Range: 11 blocks
Type of damage: Mob damage
Price: 790 coins
Rate: 2 seconds
Range: 11 blocks
Type of damage: Mob damage
Summons an iron golem.
Price: 320 coins
Rate: 1 second
Range: 14 blocks
Type of damage: Mob damage
Price: 320 coins
Rate: 1 second
Range: 14 blocks
Type of damage: Mob damage
Summons a shulker.
Price: 560 coins
Rate: 1 second
Range: 15 blocks
Type of damage: Shulker bullet damage
Price: 560 coins
Rate: 1 second
Range: 15 blocks
Type of damage: Shulker bullet damage
Summons a snowman.
Price: 410 coins
Rate: 1 second
Range: 14 blocks
Type of damage: Snowball damage
Price: 410 coins
Rate: 1 second
Range: 14 blocks
Type of damage: Snowball damage