Minecraft PC IP: play.cubecraft.net

TheZigbot9000

Dedicated Member
Jan 3, 2016
1,015
908
193
26
The North Obsidian Pillar in The End
Tower Defence is a game all about strategy, communication and most importantly knowledge. Knowledge is power, after all. I have for you all below, an assortment of organized tips and information regarding all towers that are purchasable in Tower Defence, so that you can all become the very best, like no one ever was.
Also thanks to Efcluke94 for adding a Tower Defence section to the forums, hop on over to his profile and follow him if you want to show your appreciation :)

Hey Guys Zig here bringing you an updated version to a thread made by @Sophie. Since she's on a bit of a hiatus and the thread is outdated due to some new towers coming out i thought I'd take it upon myself to update it for her. All the information she presented about the towers will be used with some additional Strength and Weaknesses plus the two other towers that was added, so please give @Sophie all the credit :). Without further ado lets get this thread started

Archer Tower
1591049806953.png

Cost: 160 coins
Space: 3x3
Information: The Archer Tower is your ideal, go-to aerial defense. It's cheap, relatively small, and is one of the few towers that deal direct damage to aerial monsters, such as Endermites, Blazes and Silverfish, whilst simultaneously providing archer support against the mobs that are on the ground. It can damage any enemy on the map with an exception to the Cave Spider, and is therefore far less opportunistic than say, the Artillery Tower. However, this seemingly overpowered jack-of-all-trades tower comes at a price; it fires relatively slowly, and does not deal very much damage on it's own. However in groups it deals significant damage to aerial mobs. Place them wisely, and spam them only when you need to.


Key Strengths: Cheap tower suitable for the early rounds. Explosive arrows helps with aerial crowd control

Key Weaknesses: Alone it struggles with groups of mobs with high amounts of health. Sometimes overshadowed by stronger towers in the game


Artillery Tower

150px-TNT_JE2_BE2.png

Cost: 240 coins
Space: 3x3
Information: This tower is your ideal, go-to land defense. Just like the Archer Tower It's cheap, relatively small, and packs a punch to any land reinforcements that may be advancing on your position. It has an adequate range, and fires explosive rounds that will damage any enemy in a nearby radius. It should always be your go-to tower if you see a wave of land reinforcements advancing. Similarly to the Archer Tower however, the Artillery Tower has its weaknesses. Artillery Towers are incapable of hitting aerial targets, meaning that enemies such as silverfish or blazes are able to blissfully fly on by, free from harm. Make sure you're well alert of which towers your team are placing, for if you place too many Artillery Towers, you may expose your weakness to aerial assaults and be swarmed with blazes before you are able to construct an adequate aerial defense. The best way to arrange Artillery Towers is to place an entire row of them adjacent to one another, to deal as much damage to crowds of enemies as possible whilst maintaining efficient spacing.

Key Strengths: Cheap, Exceptional crowd control on land. Upgrades in Path 1 allows it to stun mobs.


Key Weaknesses: Flying mobs


Poison Tower
1599623591429.png

Cost: 380 coins
Space: 3x3
Information: Poison Towers are not very effective with dealing direct damage.This isn't to say that the Poison Tower has no use however. It's strength comes from applying DOT effect, providing a passive flow of damage to monsters that lasts long after the affect was applied. Additionally, the debuff that it does will stack with the fire debuff that Mage Towers does, providing a "double threat" to mobs that aren't immune to neither effects. The best way to arrange Poison Towers is to place them far apart. This is because the Poison effect that they inflict on their targets will not stack, meaning that if the enemy is already poisoned, any further poisoning of the target will be ineffective. Place one tower at the very beginning to get the most out of the forever poison effect.

Key Strengths: Strongest at the beginning of the map, Works exceptionally well with the Mage and Ice tower.

Key Weaknesses: Not a direct damage dealer, getting weaker the closer the tower is to the castle. Flying mobs and Witches


Necromancer tower

150px-Spawner_JE3.png

Cost
: 790 coins
Space: 5x5
Information: Do not under-estimate this tower simply because it's expensive. Trust me, what this tower does will justify every penny that you spent on it. Whenever a monster enters its vicinity, it will summon... JOHN CENA!... Yes, this tower summons John Cena to fight by your side, slamming his mighty fists into the skulls of his opposition with ease, crushing any enemy troops 50ft into the ground with his godly, indisputable might. If that wasn't scary enough, you can upgrade the tower twice, granting the almighty John Cena additional speed and damage. Since John Cena's mighty fists can't reach flying mobs he can be swapped out with a Shulker or a Snowman for heavy aerial damage.

Key Strengths: John Cena can knock some mobs around, slowing them down a little. Shulkers and Snowmen provide some aerial defense.

Key Weaknesses: Slow attacking tower. Hits only a few mobs at a time.


Turret Tower
latest
1591049833879.png

Cost: 1000 coins
Space: 5x5
Information: A Turret Tower is essentially a Super Monkey with a bow. They may cost a lot and may consume a large amount of space, however they're by no means a poor purchase, given that they provide the best aerial defense of any other tower. If you feel as though your opponents may take an aerial approach on their assault, I would advise placing numerous Turret Towers in one spacious area, place an Ice Tower, apply a potion of slowness to said area in the event of an aerial assault, to allow for your Turret Towers to deal as much damage as possible.

Key Strengths: Fast attacking tower. Further upgrades either makes it attack faster or makes the arrows bounce from mob to mob. Excellent aerial crowd control.

Key Weaknesses: A rather expensive and large tower, limiting the amount you can place at one time.


Zeus Tower
150px-Beacon_JE6_BE2.png

Cost
: 1020 coins
Space: 3x3
Information: Zeus Towers are either the most useful towers in the game, or they are the least useful towers in the game. Zeus towers fire a powerful, relentless bolt of lightning down on their target's position, making them the ideal tower to use when dealing with Giants. However, given their purchase and upgrade costs, a Zeus Tower should only really be purchased if the opposition have summoned giants already, seeing as there are far more cost-efficient towers to use when dealing with say, Blazes. Sure it's a powerful tower, but it's very opportunistic and is often times unnecessary.


Key Strengths: Deals heavy damage to a single mob at once making it the ideal Giant killer. Does a small amount of damage to multiple mobs with further upgrades.

Key Weaknesses: Slow attack speed + lack of splash damage renders it not as effective against large group of mobs.


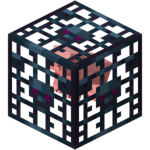
Sorcerer Tower
150px-Pig_Spawner.png

Cost
: 800 coins
Space: 3x3
Information: I like to see the Sorcerer Tower as a smaller variant to the Necromancer Tower. It will summon an entity (a farm animal, i.e. chicken, cow, mooshroom, pig, sheep) that will continuously attack any enemy in its vicinity. They aren't as powerful as the Necromancer Towers, however they're smaller in both size and cost, making them ideal to place on 3x3 paths that are too small for Necromancer placement. It is valuable to note that if you are going to place a Sorcerer Tower, you should always be willing to fully upgrade it instantly. Each upgrade will add additional farm animal support upon activation, essentially tripling your damage output.

Key Strengths: Animals can attack independently from each other dealing continuous damage to multiple mobs at once. Dangerous in numbers.


Key Weaknesses: Flying mobs


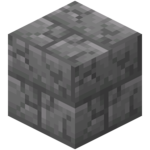
Quake Tower
150px-Cracked_Stone_Bricks_JE3_BE2.png

Cost: 200 coins
Space: 3x3
Information: The Quake Tower harnesses the power of an earthquake to stop mobs in their tracks. This tower buys you a little bit of extra time to kill particularly stronger mobs giving your other towers time to deal as much damage as possible. These are best placed far apart, as the quake effect does not stack wasting utility


Key Strengths: Stuns large groups of mobs at once and keeps them in place for a considerable amount of time

Key Weaknesses: Flying mobs, Giants are Immune


Leech Tower

150px-Nether_Star_JE3_BE2.png

Cost: 3000 coins
Space: 3x3
Information: The Leech Tower is a pretty strong tower. So strong in fact that only ONE per team is allowed to be on the map. This
tower charges up it's death ray by draining mobs of their energy as well as damage them and once fully charged unleashes an unstoppable ray of death at the sound of a dreaded lightning strike dealing devastating damage to ALL mobs on the field. I wouldn't make this your only method of defense as such great power requires a bit of time to charge up.

Key Strengths: Death ray deals massive damage to anything in its path, Flying or Grounded.


Key Weaknesses: Expensive. Takes quite a bit of time to charge up.


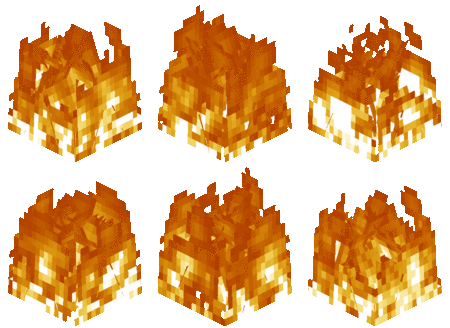
Mage Tower
150px-Fire_BE.gif

Cost
: 350 coins
Space: 3x3
Information: The Mage Tower should be among one of your first priorities upon starting a game of Tower Defense. It is one of the only two towers that are capable of targeting the infamous cave spider enemies, and is the only tower that will actually damage them. It will damage all other enemies too, making it very beneficial under any situation, and it's very cheap too! I would advise placing a Mage Tower near the spawn point, allowing it to burn any enemy reinforcements early on and dealing significant damage to them before they can get anywhere near your castle. Placing numerous Mage Towers in the same area is a mistake that many users won't make early on, as the game will STOP you from doing this. The reason why is, by placing them together, you're wasting both space and money. This is because the Fire effect that they inflict on their targets will not stack, meaning that if the enemy is already on fire, any further burning of the target will be ineffective.

Key Strengths: Deals the best AOE damage in the game, The only tower that can successfully dispatch the dreaded invisible Cave Spiders.


Key Weaknesses: Nether Mobs immune to the fire effect.


Ice Tower

150px-Ice_JE2_BE4.png

Cost
: 280 coins
Space: 3x3
Information: Me and @Sophie had very different opinions about this tower. She calls it a "hit and miss and overall ineffective tower" I personally call it a necessity. I would advise placing one of them to the adjacent side of a Mage Tower. The Ice and Mage Tower goes together like a horse and carriage. You CAN'T have one without the other. With these two towers side by side you can slow down enemies as well as do AOE damage to them, granting your team more time to react to the incoming invasion. Like the Mage Tower it can target Cave Spiders. If you're going to use this tower make sure you place it next to a mage tower. I cannot stress that enough.

Key Strengths: Significantly slows down all enemy mobs near the tower. Deals a small amount of AOE damage with further upgrades. Can target Cave Spiders.

Key Weaknesses: Not at all a damage dealer as it deals little damage to mobs. Definitely use it as a support tower.


I hope this list was informative :)
Sorry for any mistakes that are made, I'm very tired v.v I'll edit out any mistakes that I find in the morning

Glad i could edit out those mistakes for ya. Again all credit goes to @Sophie as she was the one who typed up the bulk of this information. Her thread was also the first one to make it here on the Tower Defence Forums. I just added bits and pieces of updated information. Good Luck Castle Defenders!

~Ziggy
 
Last edited:

fghj240

Member
Sep 9, 2020
7
4
4
24
Hey Guys Zig here bringing you an updated version to a thread made by @Sophie. Since she's on a bit of a hiatus and the thread is outdated due to some new towers coming out i thought I'd take it upon myself to update it for her. All the information she presented about the towers will be used with some additional Strength and Weaknesses plus the two other towers that was added, so please give @Sophie all the credit :). Without further ado lets get this thread started

Archer Tower
View attachment 166367
Cost: 160 coins
Space: 3x3
Information: The Archer Tower is your ideal, go-to aerial defense. It's cheap, relatively small, and is one of the few towers that deal direct damage to aerial monsters, such as Endermites, Blazes and Silverfish, whilst simultaneously providing archer support against the mobs that are on the ground. It can damage any enemy on the map with an exception to the Cave Spider, and is therefore far less opportunistic than say, the Artillery Tower. However, this seemingly overpowered jack-of-all-trades tower comes at a price; it fires relatively slowly, and does not deal very much damage on it's own. However in groups it deals significant damage to aerial mobs. Place them wisely, and spam them only when you need to.


Key Strengths: Cheap tower suitable for the early rounds. Explosive arrows helps with aerial crowd control

Key Weaknesses: Alone it struggles with groups of mobs with high amounts of health. Sometimes overshadowed by stronger towers in the game


Artillery Tower
150px-TNT_JE2_BE2.png

Cost: 240 coins
Space: 3x3
Information: This tower is your ideal, go-to land defense. Just like the Archer Tower It's cheap, relatively small, and packs a punch to any land reinforcements that may be advancing on your position. It has an adequate range, and fires explosive rounds that will damage any enemy in a nearby radius. It should always be your go-to tower if you see a wave of land reinforcements advancing. Similarly to the Archer Tower however, the Artillery Tower has its weaknesses. Artillery Towers are incapable of hitting aerial targets, meaning that enemies such as silverfish or blazes are able to blissfully fly on by, free from harm. Make sure you're well alert of which towers your team are placing, for if you place too many Artillery Towers, you may expose your weakness to aerial assaults and be swarmed with blazes before you are able to construct an adequate aerial defense. The best way to arrange Artillery Towers is to place an entire row of them adjacent to one another, to deal as much damage to crowds of enemies as possible whilst maintaining efficient spacing.

Key Strengths: Cheap, Exceptional crowd control on land. Upgrades in Path 1 allows it to stun mobs.


Key Weaknesses: Flying mobs


Poison Tower
150px-Splash_Potion_of_Poison.png

Cost
: 380 coins
Space: 3x3
Information: Poison Towers are not very effective with dealing direct damage.This isn't to say that the Poison Tower has no use however. It's strength comes from applying DOT effect, providing a passive flow of damage to monsters that lasts long after the affect was applied. Additionally, the debuff that it does will stack with the fire debuff that Mage Towers does, providing a "double threat" to mobs that aren't immune to neither effects. The best way to arrange Poison Towers is to place them far apart. This is because the Poison effect that they inflict on their targets will not stack, meaning that if the enemy is already poisoned, any further poisoning of the target will be ineffective. Place one tower at the very beginning to get the most out of the forever poison effect.

Key Strengths: Strongest at the beginning of the map, Works exceptionally well with the Mage and Ice tower.

Key Weaknesses: Not a direct damage dealer, getting weaker the closer the tower is to the castle. Flying mobs and Witches


Necromancer tower
150px-Spawner_JE3.png

Cost
: 790 coins
Space: 5x5
Information: Do not under-estimate this tower simply because it's expensive. Trust me, what this tower does will justify every penny that you spent on it. Whenever a monster enters its vicinity, it will summon... JOHN CENA!... Yes, this tower summons John Cena to fight by your side, slamming his mighty fists into the skulls of his opposition with ease, crushing any enemy troops 50ft into the ground with his godly, indisputable might. If that wasn't scary enough, you can upgrade the tower twice, granting the almighty John Cena additional speed and damage. Since John Cena's mighty fists can't reach flying mobs he can be swapped out with a Shulker or a Snowman for heavy aerial damage.

Key Strengths: John Cena can knock some mobs around, slowing them down a little. Shulkers and Snowmen provide some aerial defense.

Key Weaknesses: Slow attacking tower. Hits only a few mobs at a time.


Turret Tower
latest
View attachment 166368

Cost: 1000 coins
Space: 5x5
Information: A Turret Tower is essentially a Super Monkey with a bow. They may cost a lot and may consume a large amount of space, however they're by no means a poor purchase, given that they provide the best aerial defense of any other tower. If you feel as though your opponents may take an aerial approach on their assault, I would advise placing numerous Turret Towers in one spacious area, place an Ice Tower, apply a potion of slowness to said area in the event of an aerial assault, to allow for your Turret Towers to deal as much damage as possible.

Key Strengths: Fast attacking tower. Further upgrades either makes it attack faster or makes the arrows bounce from mob to mob. Excellent aerial crowd control.

Key Weaknesses: A rather expensive and large tower, limiting the amount you can place at one time.


Zeus Tower
150px-Beacon_JE6_BE2.png

Cost
: 1020 coins
Space: 3x3
Information: Zeus Towers are either the most useful towers in the game, or they are the least useful towers in the game. Zeus towers fire a powerful, relentless bolt of lightning down on their target's position, making them the ideal tower to use when dealing with Giants. However, given their purchase and upgrade costs, a Zeus Tower should only really be purchased if the opposition have summoned giants already, seeing as there are far more cost-efficient towers to use when dealing with say, Blazes. Sure it's a powerful tower, but it's very opportunistic and is often times unnecessary.


Key Strengths: Deals heavy damage to a single mob at once making it the ideal Giant killer. Does a small amount of damage to multiple mobs with further upgrades.

Key Weaknesses: Slow attack speed + lack of splash damage renders it not as effective against large group of mobs.


Sorcerer Tower
150px-Pig_Spawner.png

Cost: 800 coins

Space: 3x3
Information: I like to see the Sorcerer Tower as a smaller variant to the Necromancer Tower. It will summon an entity (a farm animal, i.e. chicken, cow, mooshroom, pig, sheep) that will continuously attack any enemy in its vicinity. They aren't as powerful as the Necromancer Towers, however they're smaller in both size and cost, making them ideal to place on 3x3 paths that are too small for Necromancer placement. It is valuable to note that if you are going to place a Sorcerer Tower, you should always be willing to fully upgrade it instantly. Each upgrade will add additional farm animal support upon activation, essentially tripling your damage output.

Key Strengths: Animals can attack independently from each other dealing continuous damage to multiple mobs at once. Dangerous in numbers.


Key Weaknesses: Flying mobs


Quake Tower
150px-Cracked_Stone_Bricks_JE3_BE2.png

Cost: 200 coins
Space: 3x3
Information: The Quake Tower harnesses the power of an earthquake to stop mobs in their tracks. This tower buys you a little bit of extra time to kill particularly stronger mobs giving your other towers time to deal as much damage as possible. These are best placed far apart, as the quake effect does not stack wasting utility


Key Strengths: Stuns large groups of mobs at once and keeps them in place for a considerable amount of time

Key Weaknesses: Flying mobs, Giants are Immune


Leech Tower
150px-Nether_Star_JE3_BE2.png

Cost: 3000 coins
Space: 3x3
Information: The Leech Tower is a pretty strong tower. So strong in fact that only ONE per team is allowed to be on the map. This
tower charges up it's death ray by draining mobs of their energy as well as damage them and once fully charged unleashes an unstoppable ray of death at the sound of a dreaded lightning strike dealing devastating damage to ALL mobs on the field. I wouldn't make this your only method of defense as such great power requires a bit of time to charge up.

Key Strengths: Death ray deals massive damage to anything in its path, Flying or Grounded.


Key Weaknesses: Expensive. Takes quite a bit of time to charge up.


Mage Tower
150px-Fire_BE.gif

Cost
: 350 coins
Space: 3x3
Information: The Mage Tower should be among one of your first priorities upon starting a game of Tower Defense. It is one of the only two towers that are capable of targeting the infamous cave spider enemies, and is the only tower that will actually damage them. It will damage all other enemies too, making it very beneficial under any situation, and it's very cheap too! I would advise placing a Mage Tower near the spawn point, allowing it to burn any enemy reinforcements early on and dealing significant damage to them before they can get anywhere near your castle. Placing numerous Mage Towers in the same area is a mistake that many users won't make early on, as the game will STOP you from doing this. The reason why is, by placing them together, you're wasting both space and money. This is because the Fire effect that they inflict on their targets will not stack, meaning that if the enemy is already on fire, any further burning of the target will be ineffective.

Key Strengths: Deals the best AOE damage in the game, The only tower that can successfully dispatch the dreaded invisible Cave Spiders.


Key Weaknesses: Nether Mobs immune to the fire effect.


Ice Tower
150px-Ice_JE2_BE4.png

Cost
: 280 coins
Space: 3x3
Information: Me and @Sophie had very different opinions about this tower. She calls it a "hit and miss and overall ineffective tower" I personally call it a necessity. I would advise placing one of them to the adjacent side of a Mage Tower. The Ice and Mage Tower goes together like a horse and carriage. You CAN'T have one without the other. With these two towers side by side you can slow down enemies as well as do AOE damage to them, granting your team more time to react to the incoming invasion. Like the Mage Tower it can target Cave Spiders. If you're going to use this tower make sure you place it next to a mage tower. I cannot stress that enough.

Key Strengths: Significantly slows down all enemy mobs near the tower. Deals a small amount of AOE damage with further upgrades. Can target Cave Spiders.

Key Weaknesses: Not at all a damage dealer as it deals little damage to mobs. Definitely use it as a support tower.


Glad i could edit out those mistakes for ya. Again all credit goes to @Sophie as she was the one who typed up the bulk of this information. Her thread was also the first one to make it here on the Tower Defence Forums. I just added bits and pieces of updated information. Good Luck Castle Defenders!

~Ziggy
This is incorrect, at least the archer tower part. Archer towers are NOT early game. In fact, towers like the mage and ice tower are far better early game.

The archer tower rules the endgame meta with its explosive ability. IT EXCELS in defeating high health enemies in groups once it has the explosive uprgade, being the bane of skeleton lvl 4's and blazes. Exosive archers, once stacked, are a force to be reckoned with.
 
  • Like
Reactions: Shotgun and Matriox

Haunted

Member
Apr 25, 2020
14
8
4
I would emphasize using the Ice tower more and place it as often as possible. It is often underused by many because it does not "attack" and even lvl 4 only does tiny and insignificant damage.

However by slowing down all the mobs that the enemy sends it is giving the other towers much more time to attack and deal damage to the mobs, as a support tower it can make the difference between a lost game and a win.
 

Shotgun

Well-Known Member
Jun 26, 2020
257
602
114
CubeCraft Universe
I would emphasize using the Ice tower more and place it as often as possible. It is often underused by many because it does not "attack" and even lvl 4 only does tiny and insignificant damage.

However by slowing down all the mobs that the enemy sends it is giving the other towers much more time to attack and deal damage to the mobs, as a support tower it can make the difference between a lost game and a win.
Actually the Ice Tower level IV does no damage, it's fake.
 
  • Like
Reactions: ItzEnd3r

TheZigbot9000

Dedicated Member
Jan 3, 2016
1,015
908
193
26
The North Obsidian Pillar in The End
Tbh i'm unhappy with this whole guide. There's false info in this guide simply because the game has given me false info. I would edit it and work on it but some of the towers don't work as intended. I can't really guarantee 100% accurate information until Tower Defense gets an update. As of now the information presented in this thread and the thread about the Mobs are accurate in accordance to the game, which is not accurate itself if you get what I mean.
 
  • Like
Reactions: Shotgun

Shotgun

Well-Known Member
Jun 26, 2020
257
602
114
CubeCraft Universe
Tbh i'm unhappy with this whole guide. There's false info in this guide simply because the game has given me false info. I would edit it and work on it but some of the towers don't work as intended. I can't really guarantee 100% accurate information until Tower Defense gets an update. As of now the information presented in this thread and the thread about the Mobs are accurate in accordance to the game, which is not accurate itself if you get what I mean.
I'm sorry to hear, if you do want to update the guide and give correct information, maybe I can help you. There is a certain group of "TD Strategists" in a community of TD, they know a lot about TD and are all professionals and on the LB. If you do want to update and revive this guide. Please contact me in conversation so I can introduce you to those TD Strategists. I'm sure they'll be happy to help you!
 
Members Online

Team online

Latest profile posts

This is YOUR daily dose of facts #38-
A book called 'A la recherche du temps perdu' by Marcel Proust contains an estimated 9,609,000 characters, making it the longest book in the world. The title translates to "Remembrance of Things Past".
TheOrderOfSapphire wrote on Mintypie231's profile.
You are so close to 400!:D
ToonBer wrote on Frontlane's profile.
1713270171790.png
ToonBer wrote on Capitan's profile.
1713269798868.png
ToonBer wrote on JokeKaedee's profile.
hello there 🍰
Top Bottom