I'm pretty new to CubeCraft, and want to make a guide to Money Walls, which is a unique game-mode that has been around for about a week. This mode is similar to BedWars, a game-mode extremely popular in Germany and hosted by numberless German Minecraft networks. This guide will be based off of my experience with BedWars and I'll also cover the main differences between Money Walls and BedWars.
All screenshots in this thread are 1280*720 and hosted via imgur. It shouldn't break, and if it does break, please contact me.
It's very simple to join Money Walls. Simply click on the emerald in the join menu, which says "||Money Walls|| --NEW".

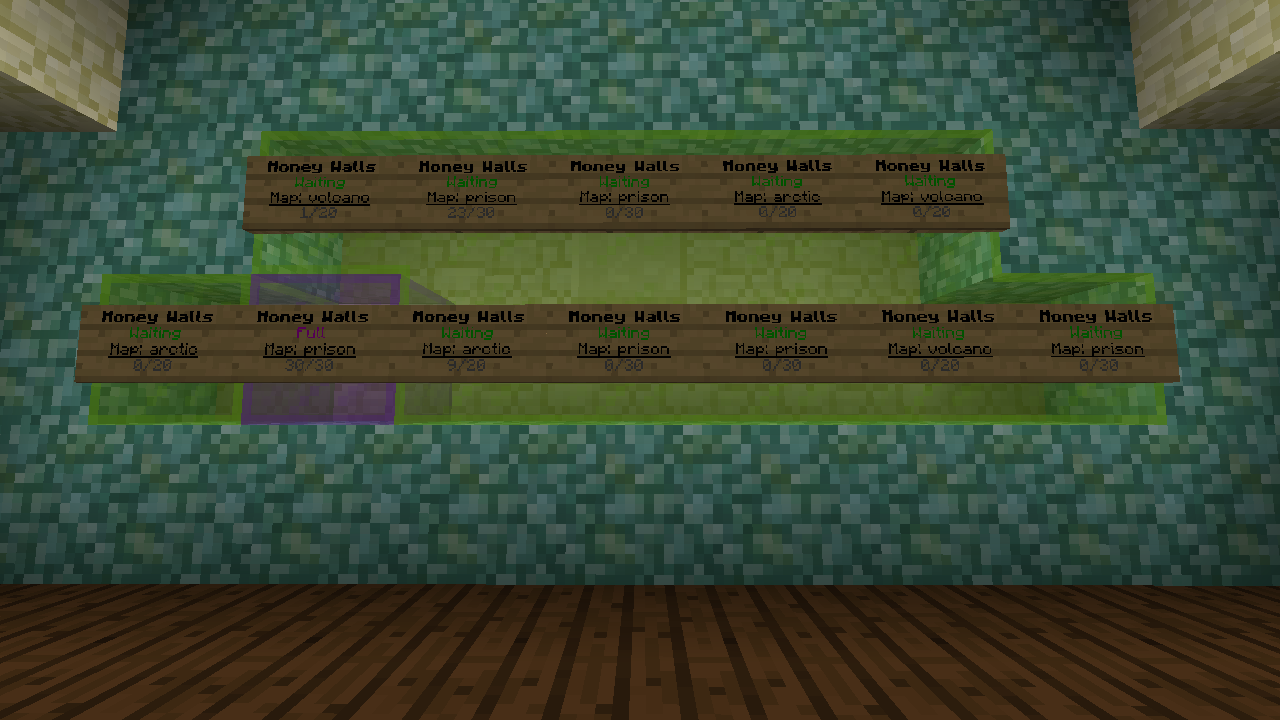
Once you click the emerald you'll be directed to one of the currently 5 MoneyWalls lobbies. Click on one of the signs to join a game.
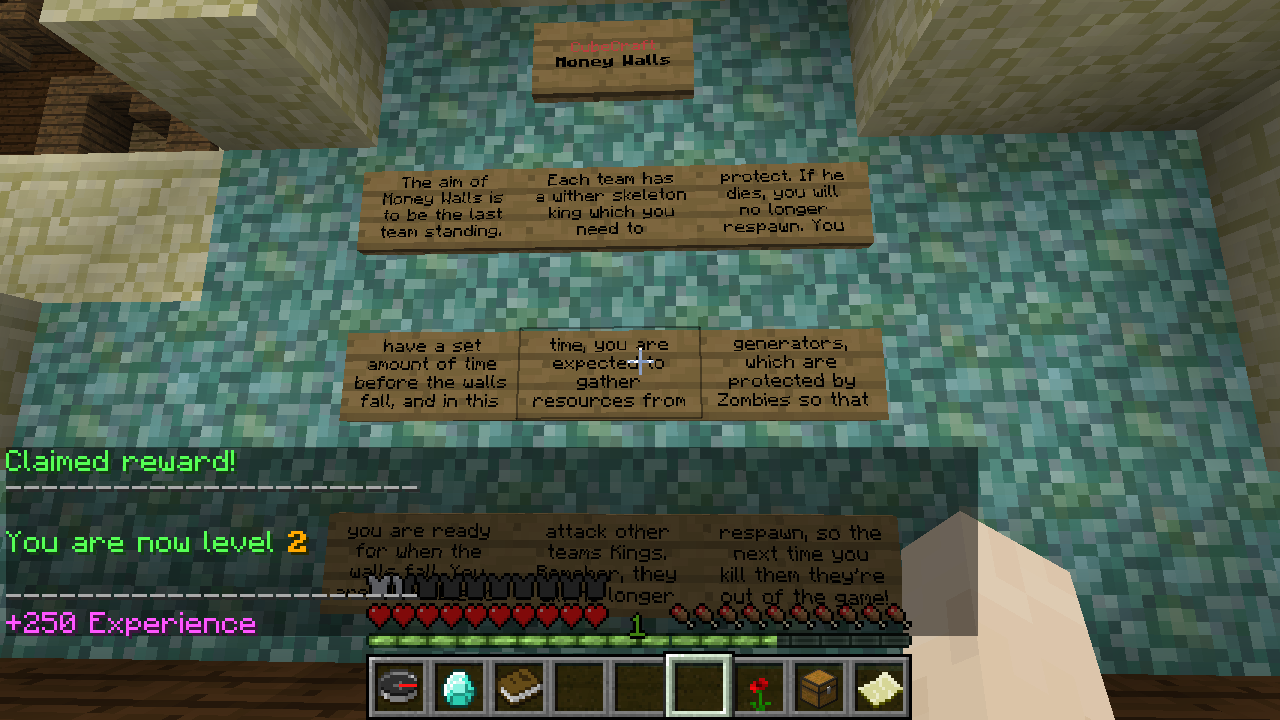
The game rules are posted in another wall on signs. It reads:
"The aim of Money Walls is to be the last team standing. Each team has a wither skeleton king which you need to protect. If he dies, you will no longer respawn. You have a set amount of time before the walls fall, and in this time, you are expected to gather resources from generators, which are protected by Zombies, so that you are ready for when the walls fall. You are also able to attack other teams' Kings. Remember, they will no longer respawn, so the next time you kill them they're out of the game!" (The screenshot also has a fancy level up message to prove that I'm such a noob)
Like any other lobbies, the Money Walls lobby also has places for Stats. This post was made about four months ago, by that time the Block Placed stat was bugged, so it showed as zero. It works fine now.

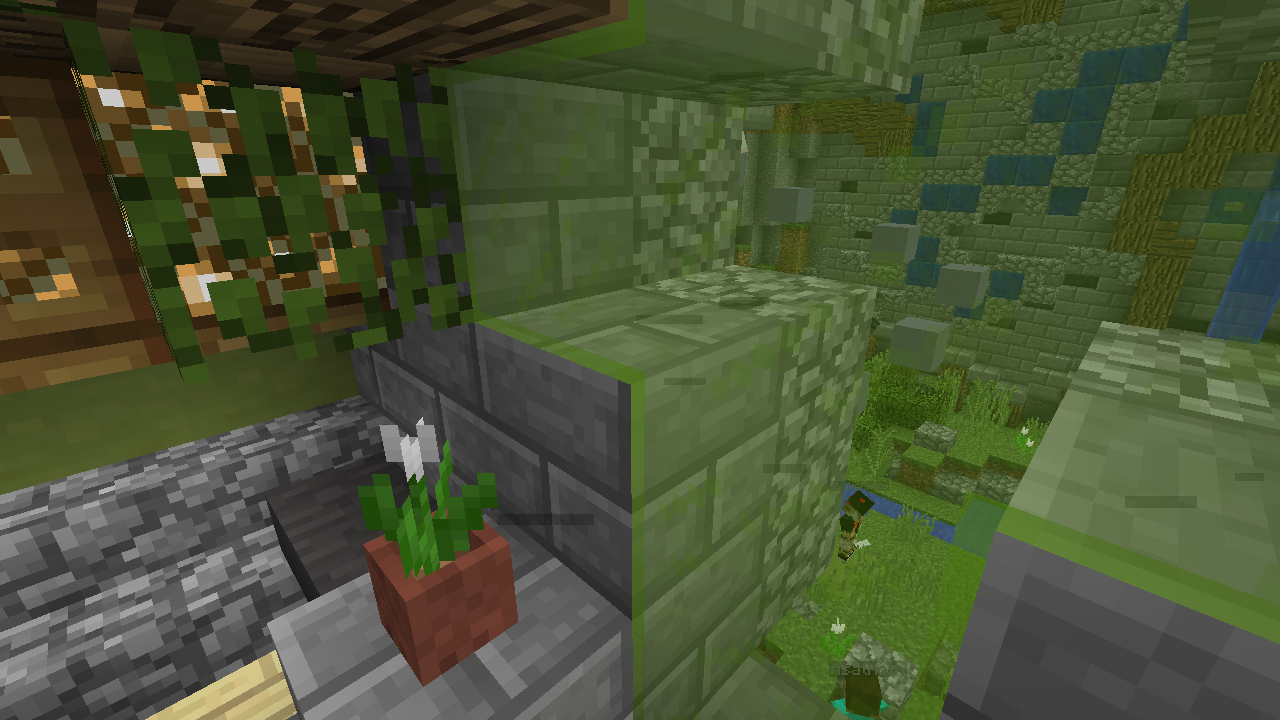
The game lobby. Classic CubeCraft style.
There are currently 3 maps in Money Wars: Volcano, Arctic, and Prison. In the map Prison, there are 2 teams each with 15 players. In the other maps, there are 4 teams with 5 players each.
Economy System:
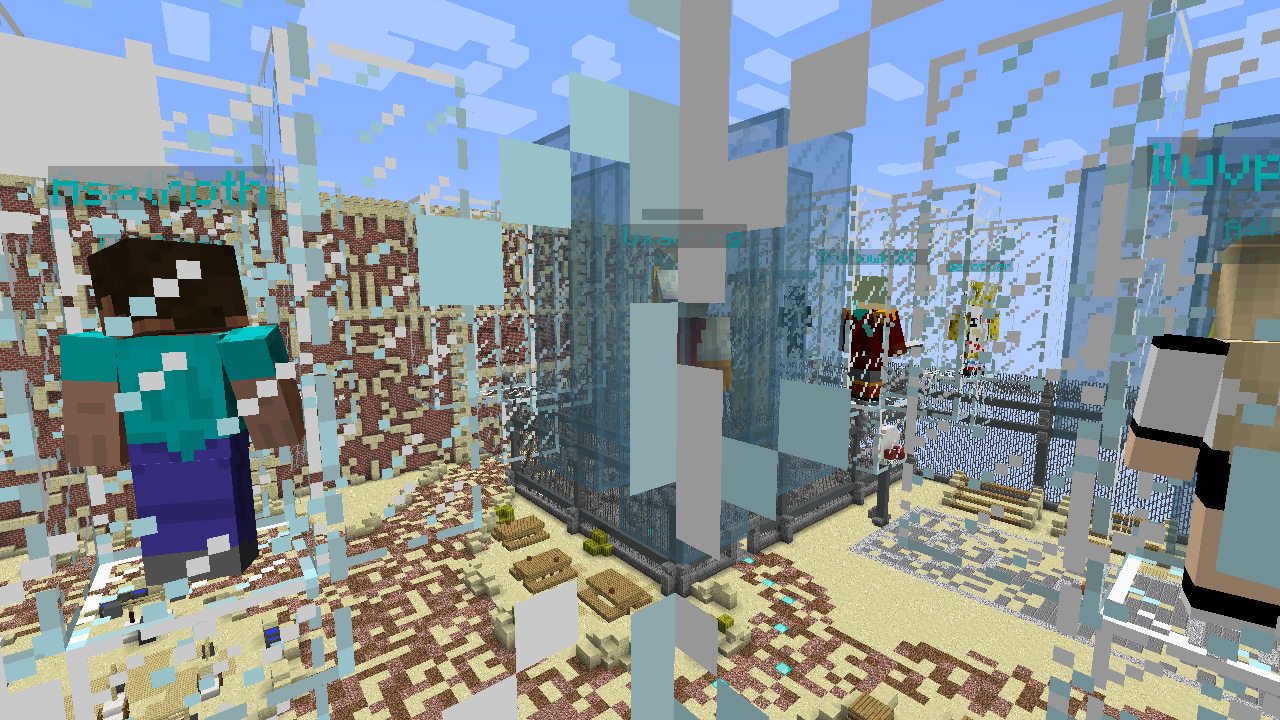
If you've played BedWars before, you'll immediately notice this familiar little Villager near the spawnpoint.
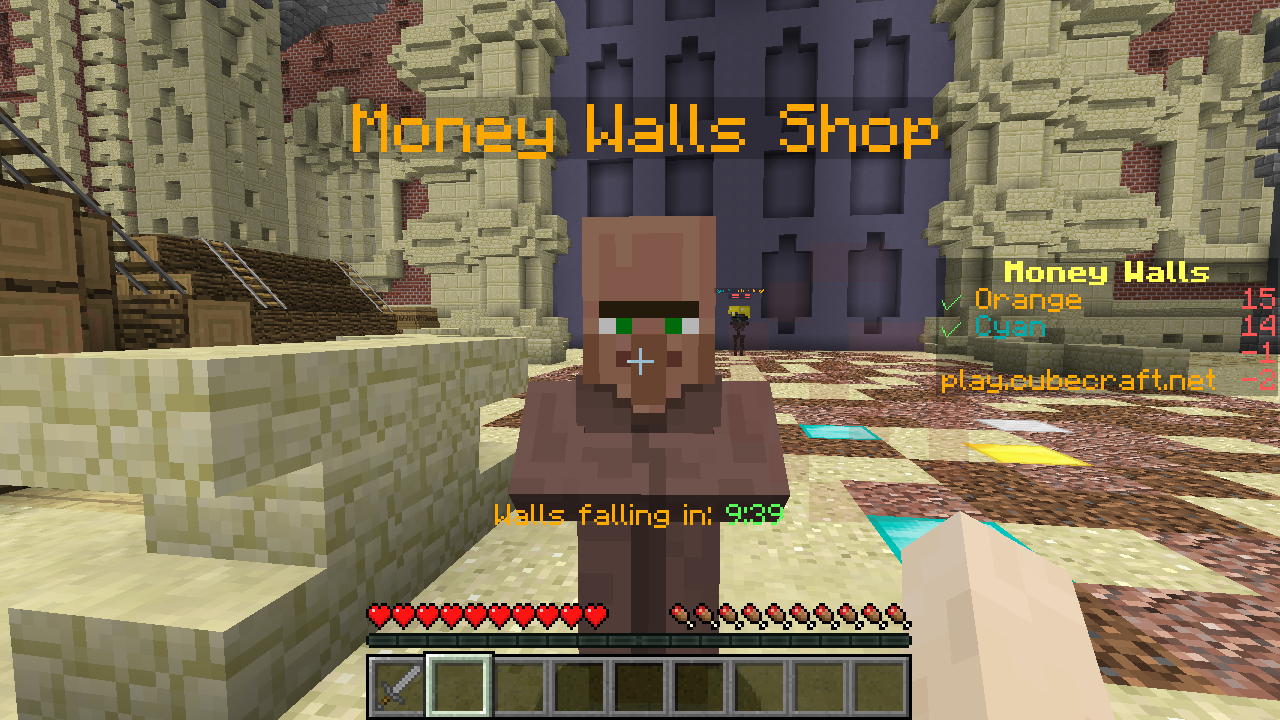
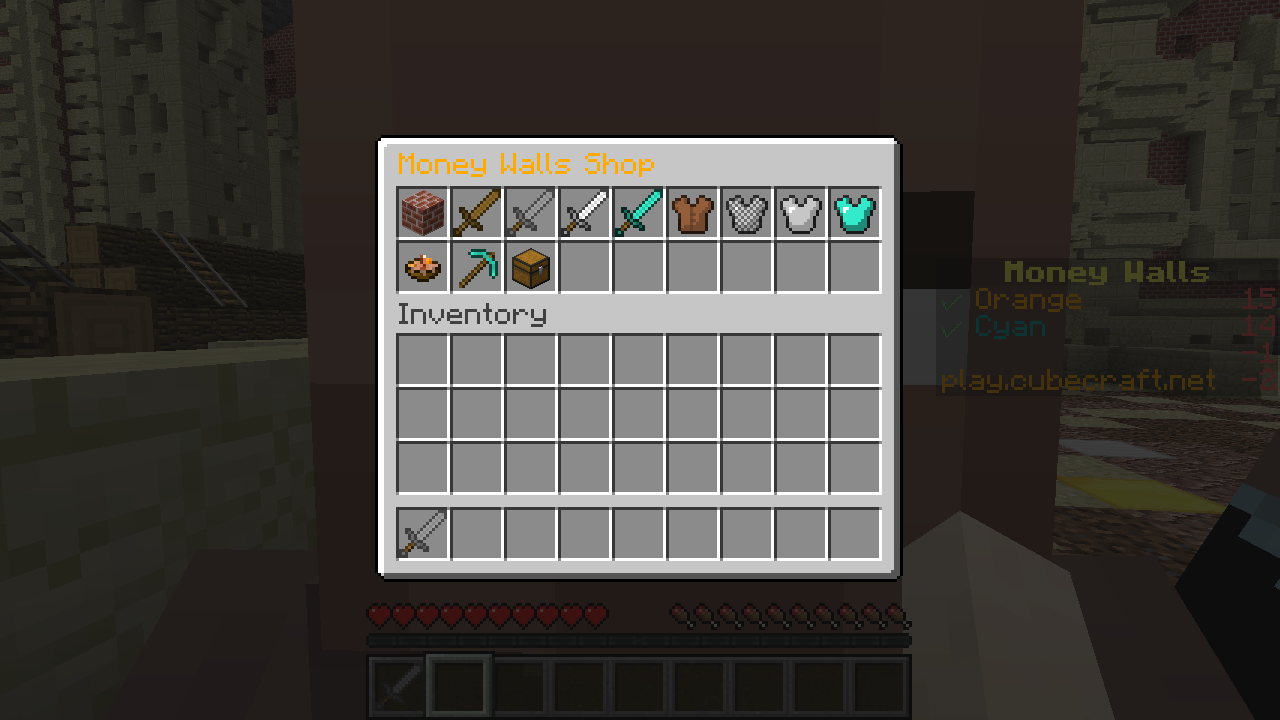
Right click the villager to bring up a menu where you can select a trade category and trade with the villager.
You can trade using 4 different currencies: Iron, Gold, Diamond and Emerald, ordered by ascending value.
The available categories are:
Building Blocks - "Purchase blocks to build with"
Wood Swords - "Purchase wood swords for iron"
Stone Swords - "Purchase stone swords for gold"
Iron Swords - "Purchase iron swords for diamonds"
Diamond Swords - "Purchase diamond swords for emeralds"
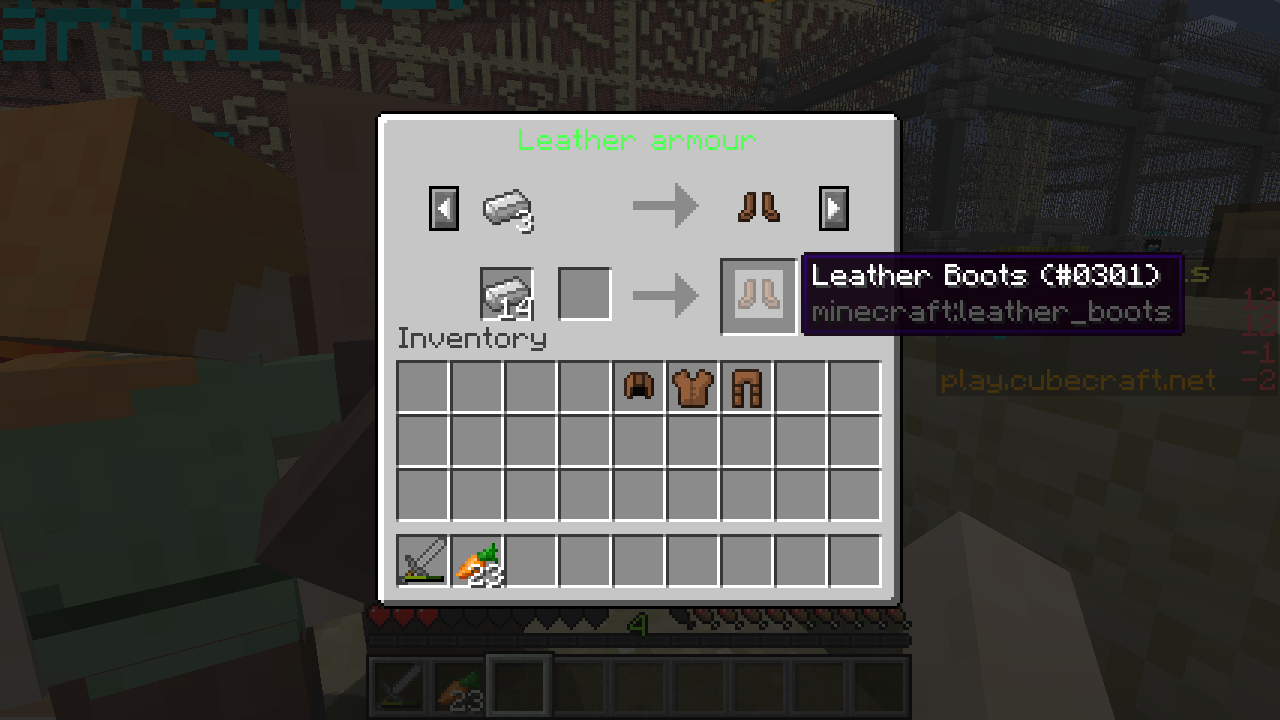
Leather Armor - "Purchase leather armor for iron"
Chain Armor - "Purchase chain armor for gold"
Iron Armor - "Purchase iron armor for diamonds"
Diamond Armor - "Purchase diamond armor for emeralds"
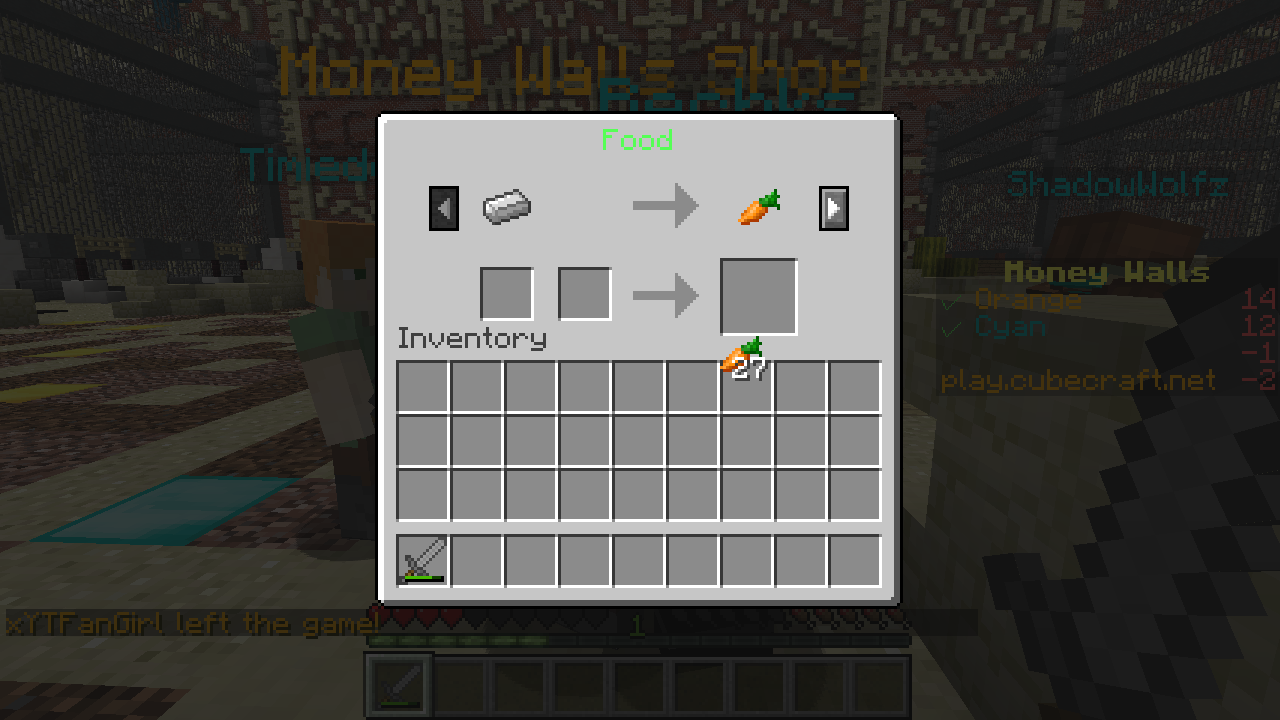
Food - "Purchase food till your satisfied"
Pickaxes - "Take a pick from many tools"
Storage - "Places to store your items and money"
The screenshots below are an example of purchasing an item from the shop:
Currency Generators
The currencies come from Generators. There are Iron, Gold and Diamond generators at different places of every team's base. Gold and Diamond generators will be broken at first. You need to use 30 iron to fix a broken Gold generator, and 16 gold to fix a broken Diamond generator. Some Iron generators are broken in the Prison map, and you need 10 iron from the working Iron generators to fix a broken one. After fixing you are still able to upgrade it. The generators can spawn mobs if they are working. A higher level generator will spawn more mobs.
Iron generator - Level 1 - 0.7 Seconds per iron - 10 Iron - Spawns a small amount of zombies
Iron generator - Level 2 - 0.5 Seconds per iron - 20 Iron - Spawns a large amount of zombies
Iron generator - Level 3 - 0.35 Seconds per iron - 30 Iron - Spawns a large amount of zombies and a small amount of skeletons
Iron generator - Level 4 - 0.25 Seconds per iron - 30 Gold - Spawns a huge amount of zombies and medium amount of skeletons
Gold generator - Level 1 - 2 Seconds per gold - 30 Iron - Spawns a medium amount of zombies and a small amount of skeletons
Gold generator - Level 2 - 1.5 Seconds per gold - 10 Gold - Spawns a large amount of zombies and a small amount of skeletons
Gold generator - Level 3 - 1 Seconds per gold - 30 Gold - Spawns a large amount of stone sword zombies and a small amount of skeletons
Diamond generator - Level 1 - 4 Seconds per diamond - 16 Gold - Spawns a medium amount of stone sword zombies
Diamond generator - Level 2 - 3 Seconds per diamond - 10 Diamond - Spawns a large amount of stone sword zombies
Diamond generator - Level 3 - 2.5 Seconds per diamond - 30 Diamond - Spawns a large amount of stone sword zombies and a small amount of full leather armor zombies
4 Emerald generators are located at center of map(8 in Prison). There are no monsters at the generators, the generators work from the start and cannot be upgraded. They generate 1 emerald per 2.5 seconds each.
Unlike in Bedwars, generated items quickly despawn after 2.5 seconds to prevent too many items from accumulating. Make sure to pick them up quickly.
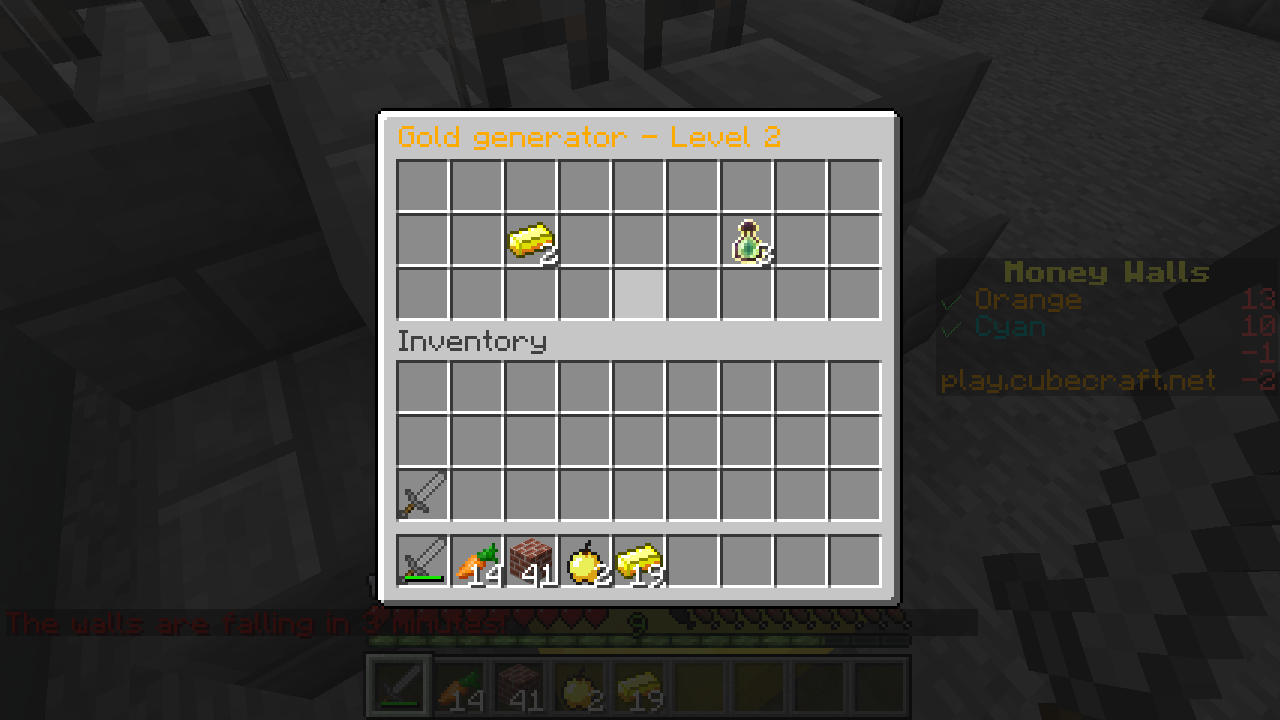
An interface will pop up when you click on the sign above the generator. It shows the generator's current level and generate speed and give you an option of upgrading the generator.
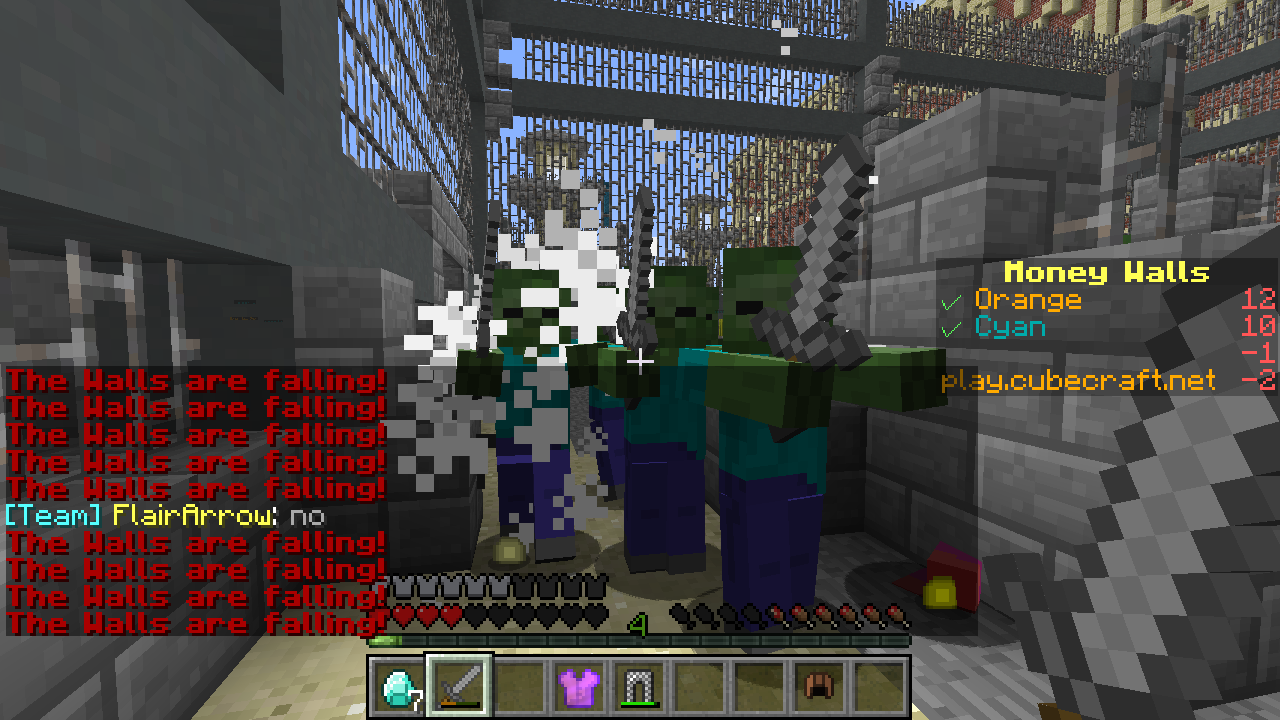
Unfortunately the room that I was in bugged so the walls couldn't fall and messages were spammed in chat. However I am still able to demonstrate things in this manner... Just a bit more annoying.
The following screenshot shows the zombies that spawn from Diamond generators. All mobs drop experiece, but not items.
Gear Up
Purchase weapons, pickaxes, armor and food from shop to prepare for battle.
Shop Items:
Swords:
Wooden Sword - 5 Iron (Unenchanted), 12 Iron (Sharp 1), 32 Iron (Sharp 2)
This sword is recommended to buy at the beginning of the game to grind off zombies and skeletons at the gold generators. Takes 67 hits to break; deals 2.5 hearts of damage.
Stone Sword - 5 Gold (Unenchanted), 12 Gold (Sharp 1), 32 Gold (Sharp 2)
This sword is recommended to buy at the beginning of the game to grind off monsters at the gold and diamond generators. It scores a three-hit kill on zombies if one of the hits is critical. Takes 133 hits to break; deals 3 hearts of damage.
Iron Sword - 5 Diamond (Unenchanted), 12 Diamond (Sharp 1), 32 Diamond (Sharp 2)
This sword is recommended for PvP battles and to grind off further monsters. It is recommended to get a Sharpness 1 one, otherwise you're better off fighting with a diamond pickaxe (seriously!) as the sword deals only slightly more damage. Takes 251 hits to break; deals 3.5 hearts of damage.
Diamond Sword - 5 Emerald (Unenchanted), 12 Emerald (Sharp 1), 32 Emerald (Sharp 2)
This sword costs emeralds and is recommended for PvP battles after you have obtained them. A sharpness I iron sword outperforms an unenchanted diamond sword. Takes 1562 hits to break; deals 4 hearts of damage.
Pickaxes:
Stone Pickaxe - 10 Iron
This pickaxe is unrecommended and you should get the Iron Pickaxe instead. It is, however, very common in Bedwars games, being the cheapest pickaxe. Unrecommended for fights. Takes 67 hits or 133 broken blocks to break; deals 2 hearts of damage.
Iron Pickaxe - 5 Gold (Efficiency 1)
This pickaxe is a recommended one if you do not have time for a diamond pickaxe. It is unrecommended for fights, though if you are confident to not let it run out you can use it to save gold. Takes 126 hits or 251 broken blocks to break; deals 2.5 hearts of damage.
Diamond Pickaxe - 10 Diamond (Efficiency 1), 20 Diamond (Efficiency 3), 30 Diamond (Efficiency 5)
This pickaxe is a good all-around tool - or weapon - to use in the game. Its high durability ensures it to almost never break in any situations. Perfect for quickly digging the enemy base out; also good to use in combat instead of swords until you have enough Emeralds to afford a diamond sword. It is, however,very expensive, the Efficiency I one is advised if you want to use it more as a weapon for its cheap cost. Takes 781 hits or 1562 broken blocks to break; deals 3 hearts of damage.
Armor:
All four pieces of armor have the same price; the prices listed are for each piece.
Having a full set of Protection 2 armor makes the direct fall from the emerald-generator tower in Prison onto the ground non-lethal. Remember, you could always use blocks to soften the falls!
Leather Armor - 3 Iron (Unenchanted), 8 Iron (Prot 1), 20 Iron (Prot 2)
Don't buy it. Repeat, don't buy it. Unless you buy the leather boots instead of the chain boots for a same amount of protection. It is dyeable using Lapis Lazuli from the Enchanter kit. A full set protects you from 28% of incoming damage; takes roughly 60 hits to break.
Chain Armor - 3 Gold (Unenchanted), 8 Gold (Prot 1), 20 Gold (Prot 2)
Good if you're not confident to survive from the mobs in the generators. Buy them as soon as you obtain 12 gold. If you're playing on Prison, it may be a good idea to use the Enchanter kit to enchant the armor and combine two Protection 1 for a Protection 2 in an anvil. Experienced players may be able to skip them and go for the iron armor directly. A full set protects you from 48% of incoming damage; takes roughly 200 hits to break.
Iron Armor - 3 Diamond (Unenchanted), 8 Diamond (Prot 1), 20 Diamond (Prot 2)
Good for PVP and fighting off mobs. Use chain helmet since it offers the same protection as the iron helmet. You should obtain the other 3 pieces as soon as you obtain 9 diamonds, unless you're equipped with chain armor enchanted with Protection 2. A full set protects you from 60% of incoming damage; takes roughly 250 hits to break.
Diamond Armor - 3 Emerald (Unenchanted), 8 Emerald (Prot 1), 20 Emerald (Prot 2)
The final tier armor. Enchanter kit is recommended to use to enchant the armor instead of buying enchanted ones from the shop, since for the extra price you can almost buy a god apple. If you are playing on Prison, combining two Protection I armor pieces for a piece of Protection II to save some emeralds. A full set protects you from 80% of incoming damage; takes roughly 450 hits to break.
Food:
Carrot - 1 Iron
It is an as efficient food source as steak, provides more hunger but far less saturation for the same price. Refills 1.5 hunger and 0.5 saturation, totals 2. (Saturation is decreased instead of hunger until it reaches zero, at which point you will start losing hunger. It is a vanilla Minecraft mechanic.)
Steak - 5 Iron
A very saturating food, providing a good amount of saturation and you can quickly refill hunger with it. Recommended over carrot at all times. Refills 4 hunger and 6 saturation, totals 10.
Cake - 12 Iron
It is not a recommended food source, except during PVP for instant hunger recovery. Refills 1 hunger and 0.5 saturation for each slice, totals 9 for the entire cake.
Golden Apple - 2 Gold
Recommended food source during PVP and sometimes used in monster grinding. Gives you Regeneration II for 4 seconds which regenerates 2 hearts of health, and provides 2 hearts of extra absorption health which can last for a maximum of 2 minutes. Refills 2 hunger and 3.5 saturation, totals 5.5.
God Apple - 32 Emerald
Basically makes you impossible to die for half a minute. Grants you Regeneration 5 for 24 seconds which keeps your health full unless you have poor armor, provides 2 hearts of absorption health, and makes you take 20% less damage and be resistant to fire for 5 minutes. Recommended in any fights with your opponents having an advantage, or better skill, over you. Refills 2 hunger and 3.5 saturation, totals 5.5.
You can rename items in anvils that appear in the Prison map. You are also able to combine enchantments on the items. You can get a Protection II armor or Sharpness II sword at a reduced price, or even obtain better weapons and armor. Doing so require a lot of EXP though, grinding in Diamond mine is recommended. (P.S. Item names will NOT show in kill messages unlike another large server whose name should not be said for obvious reasons.)

Protecting Your Wither:
Your wither is a very fragile being that all of your team rely on. If your wither is killed, you will no longer be able to respawn. Typically withers take about 10 hits to kill, similar to a player with iron armor. You can score crits to deal more damage to the wither.
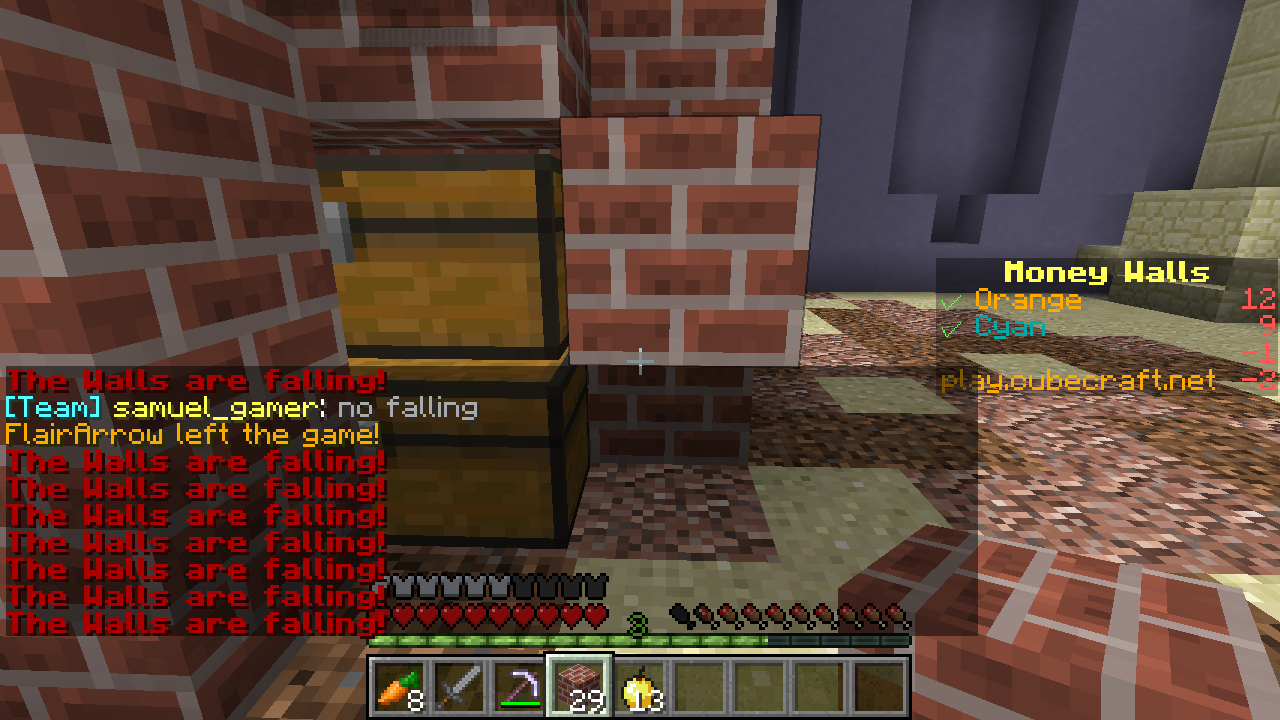
You are only able to break blocks that are placed during the game. You can buy a pickaxe and destroy other team's barriers in order to kill their skeleton king and make them no longer able to respawn. Buying obsidian using diamonds is useful but very expensive. Buying chests using gold is a great solution. Chests are a powerful barricade that enemies have to dig for 5 seconds to break, no matter what tool they're using. They're the toughest block available if the opponent has an Efficiency V diamond pickaxe.
The following chart is for all blocks available in the shop; it only includes breaking time with Stone, Iron and Efficiency 5 Diamond pickaxes as these are the most common in the game.
Shop Items:
Building Blocks:
Bricks - 1 Iron
Breaking time: 1 second (Stone), 0.7 seconds (Iron) 0.1 seconds (Eff 5 Diamond)
Bricks are the basic blocks you can use to defend your Wither. It can be easily broken by all kinds of pickaxes and thus is not recommended. However it comes at a cheap price and is a good block to quickly place during PVP to interfere enemy movement.
Glass - 2 Iron
Breaking time: 0.2 seconds (Stone), 0.2 seconds (Iron), 0.2 seconds (Eff 5 Diamond)
Glass blocks are weak blocks that you can see through. It is unrecommended as it can be broken in 0.25. The only case that it's broken slower than a Brick block is when the opponent has an Efficiency III/V diamond pickaxe.
Glowstone - 2 Iron
Breaking time: 0.8 seconds (Stone), 0.8 seconds (Iron), 0.8 seconds (Eff 5 Diamond)
Glowstone blocks are tougher than glass and emit light. It is a cheap, recommended choice to protect your Wither since Glowstone is always broken in 0.8 seconds regardless of what tool the opponent uses.
Obsidian - 10 Diamond
Breaking time: 40 seconds (Stone), 25 seconds (Iron), 3 seconds (Eff 5 Diamond)
Obsidian blocks are the toughest blocks in the game. It takes about 25 seconds to break using the Iron pickaxe, 9 seconds with the Efficiency I diamond pickaxe and 3 seconds with the strongest Efficiency V pickaxe. It is very expensively priced at 10 diamonds. It is recommended to chosoe the Defender kit to gain 10 free obsidian blocks instead of buying them with diamonds.
Food:
Cake - 12 Iron
Breaking time: 0.2 seconds (Stone), 0.2 seconds (Iron), 0.2 seconds (Eff 5 Diamond)
Wait seriously, are you thinking of using a CAKE to defend your base? Despite functioning as a half-block, unlike Bedwars it has no uses other than eating, due to the absence of Bows in Money Walls.
Storage:
Chest - 5 Gold
Breaking time: 5 seconds (Stone), 5 seconds (Iron), 5 seconds (Eff 5 Diamond)
Many players might not even think of it, but it is actually an effective block to use to defend your base. A chest takes 5 seconds to break with any equipment, making it tougher than obsidian for Efficiency V diamond pickaxe wielders. The con is, the chest is less than a full block large and opponents can dig (and attack your Wither!) through the openings. The advised use is to surround your wither with Obsidian first, then surround the obsidian with chests.
Ender Chest - 10 Diamond
Breaking time: 6 seconds (Stone), 4 seconds (Iron), 0.9 seconds (Eff 5 Diamond)
Though it is a place-able block, it is useless compared to Obsidian, priced the same and significantly weaker.
All screenshots in this thread are 1280*720 and hosted via imgur. It shouldn't break, and if it does break, please contact me.
It's very simple to join Money Walls. Simply click on the emerald in the join menu, which says "||Money Walls|| --NEW".
Once you click the emerald you'll be directed to one of the currently 5 MoneyWalls lobbies. Click on one of the signs to join a game.
The game rules are posted in another wall on signs. It reads:
"The aim of Money Walls is to be the last team standing. Each team has a wither skeleton king which you need to protect. If he dies, you will no longer respawn. You have a set amount of time before the walls fall, and in this time, you are expected to gather resources from generators, which are protected by Zombies, so that you are ready for when the walls fall. You are also able to attack other teams' Kings. Remember, they will no longer respawn, so the next time you kill them they're out of the game!" (The screenshot also has a fancy level up message to prove that I'm such a noob)
Like any other lobbies, the Money Walls lobby also has places for Stats. This post was made about four months ago, by that time the Block Placed stat was bugged, so it showed as zero. It works fine now.
The game lobby. Classic CubeCraft style.
There are currently 3 maps in Money Wars: Volcano, Arctic, and Prison. In the map Prison, there are 2 teams each with 15 players. In the other maps, there are 4 teams with 5 players each.
Economy System:
If you've played BedWars before, you'll immediately notice this familiar little Villager near the spawnpoint.
Right click the villager to bring up a menu where you can select a trade category and trade with the villager.
You can trade using 4 different currencies: Iron, Gold, Diamond and Emerald, ordered by ascending value.
The available categories are:
Building Blocks - "Purchase blocks to build with"
Wood Swords - "Purchase wood swords for iron"
Stone Swords - "Purchase stone swords for gold"
Iron Swords - "Purchase iron swords for diamonds"
Diamond Swords - "Purchase diamond swords for emeralds"
Leather Armor - "Purchase leather armor for iron"
Chain Armor - "Purchase chain armor for gold"
Iron Armor - "Purchase iron armor for diamonds"
Diamond Armor - "Purchase diamond armor for emeralds"
Food - "Purchase food till your satisfied"
Pickaxes - "Take a pick from many tools"
Storage - "Places to store your items and money"
The screenshots below are an example of purchasing an item from the shop:
Currency Generators
The currencies come from Generators. There are Iron, Gold and Diamond generators at different places of every team's base. Gold and Diamond generators will be broken at first. You need to use 30 iron to fix a broken Gold generator, and 16 gold to fix a broken Diamond generator. Some Iron generators are broken in the Prison map, and you need 10 iron from the working Iron generators to fix a broken one. After fixing you are still able to upgrade it. The generators can spawn mobs if they are working. A higher level generator will spawn more mobs.
Iron generator - Level 1 - 0.7 Seconds per iron - 10 Iron - Spawns a small amount of zombies
Iron generator - Level 2 - 0.5 Seconds per iron - 20 Iron - Spawns a large amount of zombies
Iron generator - Level 3 - 0.35 Seconds per iron - 30 Iron - Spawns a large amount of zombies and a small amount of skeletons
Iron generator - Level 4 - 0.25 Seconds per iron - 30 Gold - Spawns a huge amount of zombies and medium amount of skeletons
Gold generator - Level 1 - 2 Seconds per gold - 30 Iron - Spawns a medium amount of zombies and a small amount of skeletons
Gold generator - Level 2 - 1.5 Seconds per gold - 10 Gold - Spawns a large amount of zombies and a small amount of skeletons
Gold generator - Level 3 - 1 Seconds per gold - 30 Gold - Spawns a large amount of stone sword zombies and a small amount of skeletons
Diamond generator - Level 1 - 4 Seconds per diamond - 16 Gold - Spawns a medium amount of stone sword zombies
Diamond generator - Level 2 - 3 Seconds per diamond - 10 Diamond - Spawns a large amount of stone sword zombies
Diamond generator - Level 3 - 2.5 Seconds per diamond - 30 Diamond - Spawns a large amount of stone sword zombies and a small amount of full leather armor zombies
4 Emerald generators are located at center of map(8 in Prison). There are no monsters at the generators, the generators work from the start and cannot be upgraded. They generate 1 emerald per 2.5 seconds each.
Unlike in Bedwars, generated items quickly despawn after 2.5 seconds to prevent too many items from accumulating. Make sure to pick them up quickly.
An interface will pop up when you click on the sign above the generator. It shows the generator's current level and generate speed and give you an option of upgrading the generator.
Unfortunately the room that I was in bugged so the walls couldn't fall and messages were spammed in chat. However I am still able to demonstrate things in this manner... Just a bit more annoying.
The following screenshot shows the zombies that spawn from Diamond generators. All mobs drop experiece, but not items.
Gear Up
Purchase weapons, pickaxes, armor and food from shop to prepare for battle.
Shop Items:
Swords:
Wooden Sword - 5 Iron (Unenchanted), 12 Iron (Sharp 1), 32 Iron (Sharp 2)
This sword is recommended to buy at the beginning of the game to grind off zombies and skeletons at the gold generators. Takes 67 hits to break; deals 2.5 hearts of damage.
Stone Sword - 5 Gold (Unenchanted), 12 Gold (Sharp 1), 32 Gold (Sharp 2)
This sword is recommended to buy at the beginning of the game to grind off monsters at the gold and diamond generators. It scores a three-hit kill on zombies if one of the hits is critical. Takes 133 hits to break; deals 3 hearts of damage.
Iron Sword - 5 Diamond (Unenchanted), 12 Diamond (Sharp 1), 32 Diamond (Sharp 2)
This sword is recommended for PvP battles and to grind off further monsters. It is recommended to get a Sharpness 1 one, otherwise you're better off fighting with a diamond pickaxe (seriously!) as the sword deals only slightly more damage. Takes 251 hits to break; deals 3.5 hearts of damage.
Diamond Sword - 5 Emerald (Unenchanted), 12 Emerald (Sharp 1), 32 Emerald (Sharp 2)
This sword costs emeralds and is recommended for PvP battles after you have obtained them. A sharpness I iron sword outperforms an unenchanted diamond sword. Takes 1562 hits to break; deals 4 hearts of damage.
Pickaxes:
Stone Pickaxe - 10 Iron
This pickaxe is unrecommended and you should get the Iron Pickaxe instead. It is, however, very common in Bedwars games, being the cheapest pickaxe. Unrecommended for fights. Takes 67 hits or 133 broken blocks to break; deals 2 hearts of damage.
Iron Pickaxe - 5 Gold (Efficiency 1)
This pickaxe is a recommended one if you do not have time for a diamond pickaxe. It is unrecommended for fights, though if you are confident to not let it run out you can use it to save gold. Takes 126 hits or 251 broken blocks to break; deals 2.5 hearts of damage.
Diamond Pickaxe - 10 Diamond (Efficiency 1), 20 Diamond (Efficiency 3), 30 Diamond (Efficiency 5)
This pickaxe is a good all-around tool - or weapon - to use in the game. Its high durability ensures it to almost never break in any situations. Perfect for quickly digging the enemy base out; also good to use in combat instead of swords until you have enough Emeralds to afford a diamond sword. It is, however,very expensive, the Efficiency I one is advised if you want to use it more as a weapon for its cheap cost. Takes 781 hits or 1562 broken blocks to break; deals 3 hearts of damage.
Armor:
All four pieces of armor have the same price; the prices listed are for each piece.
Having a full set of Protection 2 armor makes the direct fall from the emerald-generator tower in Prison onto the ground non-lethal. Remember, you could always use blocks to soften the falls!
Leather Armor - 3 Iron (Unenchanted), 8 Iron (Prot 1), 20 Iron (Prot 2)
Don't buy it. Repeat, don't buy it. Unless you buy the leather boots instead of the chain boots for a same amount of protection. It is dyeable using Lapis Lazuli from the Enchanter kit. A full set protects you from 28% of incoming damage; takes roughly 60 hits to break.
Chain Armor - 3 Gold (Unenchanted), 8 Gold (Prot 1), 20 Gold (Prot 2)
Good if you're not confident to survive from the mobs in the generators. Buy them as soon as you obtain 12 gold. If you're playing on Prison, it may be a good idea to use the Enchanter kit to enchant the armor and combine two Protection 1 for a Protection 2 in an anvil. Experienced players may be able to skip them and go for the iron armor directly. A full set protects you from 48% of incoming damage; takes roughly 200 hits to break.
Iron Armor - 3 Diamond (Unenchanted), 8 Diamond (Prot 1), 20 Diamond (Prot 2)
Good for PVP and fighting off mobs. Use chain helmet since it offers the same protection as the iron helmet. You should obtain the other 3 pieces as soon as you obtain 9 diamonds, unless you're equipped with chain armor enchanted with Protection 2. A full set protects you from 60% of incoming damage; takes roughly 250 hits to break.
Diamond Armor - 3 Emerald (Unenchanted), 8 Emerald (Prot 1), 20 Emerald (Prot 2)
The final tier armor. Enchanter kit is recommended to use to enchant the armor instead of buying enchanted ones from the shop, since for the extra price you can almost buy a god apple. If you are playing on Prison, combining two Protection I armor pieces for a piece of Protection II to save some emeralds. A full set protects you from 80% of incoming damage; takes roughly 450 hits to break.
Food:
Carrot - 1 Iron
It is an as efficient food source as steak, provides more hunger but far less saturation for the same price. Refills 1.5 hunger and 0.5 saturation, totals 2. (Saturation is decreased instead of hunger until it reaches zero, at which point you will start losing hunger. It is a vanilla Minecraft mechanic.)
Steak - 5 Iron
A very saturating food, providing a good amount of saturation and you can quickly refill hunger with it. Recommended over carrot at all times. Refills 4 hunger and 6 saturation, totals 10.
Cake - 12 Iron
It is not a recommended food source, except during PVP for instant hunger recovery. Refills 1 hunger and 0.5 saturation for each slice, totals 9 for the entire cake.
Golden Apple - 2 Gold
Recommended food source during PVP and sometimes used in monster grinding. Gives you Regeneration II for 4 seconds which regenerates 2 hearts of health, and provides 2 hearts of extra absorption health which can last for a maximum of 2 minutes. Refills 2 hunger and 3.5 saturation, totals 5.5.
God Apple - 32 Emerald
Basically makes you impossible to die for half a minute. Grants you Regeneration 5 for 24 seconds which keeps your health full unless you have poor armor, provides 2 hearts of absorption health, and makes you take 20% less damage and be resistant to fire for 5 minutes. Recommended in any fights with your opponents having an advantage, or better skill, over you. Refills 2 hunger and 3.5 saturation, totals 5.5.
You can rename items in anvils that appear in the Prison map. You are also able to combine enchantments on the items. You can get a Protection II armor or Sharpness II sword at a reduced price, or even obtain better weapons and armor. Doing so require a lot of EXP though, grinding in Diamond mine is recommended. (P.S. Item names will NOT show in kill messages unlike another large server whose name should not be said for obvious reasons.)
Protecting Your Wither:
Your wither is a very fragile being that all of your team rely on. If your wither is killed, you will no longer be able to respawn. Typically withers take about 10 hits to kill, similar to a player with iron armor. You can score crits to deal more damage to the wither.
You are only able to break blocks that are placed during the game. You can buy a pickaxe and destroy other team's barriers in order to kill their skeleton king and make them no longer able to respawn. Buying obsidian using diamonds is useful but very expensive. Buying chests using gold is a great solution. Chests are a powerful barricade that enemies have to dig for 5 seconds to break, no matter what tool they're using. They're the toughest block available if the opponent has an Efficiency V diamond pickaxe.
The following chart is for all blocks available in the shop; it only includes breaking time with Stone, Iron and Efficiency 5 Diamond pickaxes as these are the most common in the game.
Shop Items:
Building Blocks:
Bricks - 1 Iron
Breaking time: 1 second (Stone), 0.7 seconds (Iron) 0.1 seconds (Eff 5 Diamond)
Bricks are the basic blocks you can use to defend your Wither. It can be easily broken by all kinds of pickaxes and thus is not recommended. However it comes at a cheap price and is a good block to quickly place during PVP to interfere enemy movement.
Glass - 2 Iron
Breaking time: 0.2 seconds (Stone), 0.2 seconds (Iron), 0.2 seconds (Eff 5 Diamond)
Glass blocks are weak blocks that you can see through. It is unrecommended as it can be broken in 0.25. The only case that it's broken slower than a Brick block is when the opponent has an Efficiency III/V diamond pickaxe.
Glowstone - 2 Iron
Breaking time: 0.8 seconds (Stone), 0.8 seconds (Iron), 0.8 seconds (Eff 5 Diamond)
Glowstone blocks are tougher than glass and emit light. It is a cheap, recommended choice to protect your Wither since Glowstone is always broken in 0.8 seconds regardless of what tool the opponent uses.
Obsidian - 10 Diamond
Breaking time: 40 seconds (Stone), 25 seconds (Iron), 3 seconds (Eff 5 Diamond)
Obsidian blocks are the toughest blocks in the game. It takes about 25 seconds to break using the Iron pickaxe, 9 seconds with the Efficiency I diamond pickaxe and 3 seconds with the strongest Efficiency V pickaxe. It is very expensively priced at 10 diamonds. It is recommended to chosoe the Defender kit to gain 10 free obsidian blocks instead of buying them with diamonds.
Food:
Cake - 12 Iron
Breaking time: 0.2 seconds (Stone), 0.2 seconds (Iron), 0.2 seconds (Eff 5 Diamond)
Wait seriously, are you thinking of using a CAKE to defend your base? Despite functioning as a half-block, unlike Bedwars it has no uses other than eating, due to the absence of Bows in Money Walls.
Storage:
Chest - 5 Gold
Breaking time: 5 seconds (Stone), 5 seconds (Iron), 5 seconds (Eff 5 Diamond)
Many players might not even think of it, but it is actually an effective block to use to defend your base. A chest takes 5 seconds to break with any equipment, making it tougher than obsidian for Efficiency V diamond pickaxe wielders. The con is, the chest is less than a full block large and opponents can dig (and attack your Wither!) through the openings. The advised use is to surround your wither with Obsidian first, then surround the obsidian with chests.
Ender Chest - 10 Diamond
Breaking time: 6 seconds (Stone), 4 seconds (Iron), 0.9 seconds (Eff 5 Diamond)
Though it is a place-able block, it is useless compared to Obsidian, priced the same and significantly weaker.
Last edited:
